How to Tips on Tiling a Shower Floor
By Mark J. Donovan
|
|
If you are considering building a custom ceramic tile shower that will include a ceramic tile shower floor then there are a few things you need to understand up front.
Ceramic Tile Shower Floor Site PreparationFirst, the subfloor underneath the shower needs to be solid with little to no deflection. A tiled shower floor will not last long if the subfloor is not completely stable. |
If you determine the subfloor has any deflection or bounce in it, include an additional layer of either ½” or ¾” CDX exterior grade plywood over it before proceeding.
Make sure to fasten the extra layer of plywood with 2-1/2 inch screws and that they penetrate into the floor joists. In addition, install additional 1-1/4’ screws on 6” centers around the entire area of the shower floor. Read this article to learn more on how to frame a shower pan base area.
Installing Mortar Shower Pan
Second, at the heart of a custom ceramic tile shower with a tiled shower floor is a mortar shower pan. A mortar shower pan basically consists of a flexible shower pan membrane liner sandwiched in-between two layers of sloped mortar. If you want to learn more about installing a mortar shower pan see my “Shower Pan Membrane Liner Installation Ebook”.
Tiling a Shower FloorOnce you have installed the mortar shower pan, and cement backer board on the shower walls you can begin your ceramic tiling job. Prior to tiling the shower floor, first lay cardboard on the shower floor and then tile the shower walls. Tiling the shower walls is a messy business and inevitably you will be spilling some thinset mortar on the shower floor. In addition, you may inadvertently drop a wall tile. Consequently it is best to tile the shower walls first. |
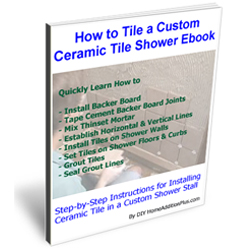
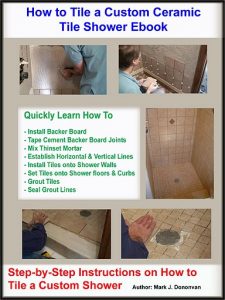 Get this eBook on how to tile a shower. |
Tiling Shower Floor
Once you have completed tiling the shower walls you can begin to tile the shower floor. I recommend using smaller tiles, e.g. 1 square foot sheets of 2”x2” floor tiles.
Watch this video on tiling a shower floor and curb.
Using larger tiles on shower floors is wrong on multiple levels. First, large tiles can be naturally slippery. Smaller shower floor tiles, on the other hand, can offer greater traction due to grout lines spaced every two inches. Second, large tiles will not contour well to the slope of the shower mortar pan and thus you may end up with either reduced slope or odd angled shower floor tiles.
| Another side benefit of using the 1 square foot sheets of 2”x2” ceramic tiles is that they are already pre-spaced so no tile spacers are required.
Depending upon the area of the shower floor you can either tile from the center and work your way outwards to the shower walls or you can simply start on one side of the shower and work your way across the shower floor. |
 |
If the shower floor is larger than 3’x3’ then I would recommend finding the X and Y centers of the shower floor and drawing center reference lines. Once the center lines are drawn you can tile outwards from these lines to the shower walls.
If the shower floor is 3’x3’ or less in area and the shower walls are square, then I would suggest starting in one corner of the shower and working your way across the shower floor.
Use a thinset mortar of a pasty like consistency and a ¼” notched trowel to apply the mortar to the shower floor. Then simply lie in the ceramic tile sheets and press them firmly into place.
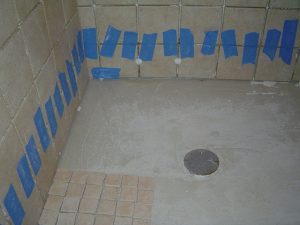
As you get over the shower drain area, mark the tile sheet for the drain opening and then cut the tile sheet(s) accordingly using a tile saw/cutter and/or tile nippers.
Once you have completed tiling the shower floor, allow the thinset mortar to set up for 24 hours.Applying Grout to Shower Walls & FloorTo complete your shower floor tiling project I recommend applying grout first to the shower walls and then the shower floor. Make sure to wipe the ceramic tiles down with a sponge and water within 10 to 15 minutes after installing the grout. Continue to wipe the shower walls and floor every 15 minutes or so until the tiles are sparkling clean. |
Immediately Downloadable |
Finally, seal the shower floor and walls with a tile sealer to help reduce mold and mildew growth.
For information on installing a shower pan membrane liner for a ceramic tile shower, see the Shower Pan Membrane Liner Installation Ebook from HomeAdditionPlus.com. The Shower Pan Membrane Liner EBook will quickly teach you the step-by-step process for installing the shower pan membrane liner correctly. It includes instructions on framing the shower stall, pouring the pre-slope and shower base mortar, and installing the shower pan membrane liner.

See HomeAdditionPlus.com’s Ceramic Tile Calculator
See my “How to Tile a Custom Ceramic Tile Shower” Ebook to learn how to tile your own shower: For a detailed set of instructions on tiling a shower floor and walls, including pictures for every step in the process, see my “How to Tile Custom Ceramic Tile Shower Ebook”.

Related Information on Tiling a Shower
Additional Ceramic Tile Resources from Amazon.com
 |
 |
 |
Get Free Bathroom Remodeling Price Quotes with No Obligation!
Fill out our 3-5 minute quick and easy form, and receive a free price quote on a bathroom remodeling project from one of our pre-screened and licensed bathroom remodeling contractors. This process is free and there is no obligation to continue once you receive your bathroom addition price estimate.