Step by Step Instructions on how to Remove and Replace a Broken Ceramic Tile
By Mark J. Donovan
|
|
Ceramic tile is brittle, and can consequently break easily if something is dropped on them or if a hard object hits them. Thus it is wise when doing a ceramic tile installation project to save a few spare tiles, because someday you will inevitably need to remove a broken tile and replace it with a new one.
Tools Required
|
Step 1 – Site Preparation
First begin by adding some layer of protection around the broken tile so that you do not damage the surrounding tile. For example use cardboard or a drop cloth to cover the surrounding tiles.
If the broken tile is around a fixture, such as a faucet, remove the faucet.
Step 3 – Removing the Broken Ceramic Tile
Once the grout has been removed, apply masking tape in an X pattern across the surface of the tile. This will help to prevent the flying of broken ceramic tile chips.
Next using your hammer and screwdriver/chisel carefully tap and crack the ceramic tile over the X masking tape pattern.
Once you have cracked the ceramic tile, use your hammer and chisel to knock out and pry away the broken pieces.
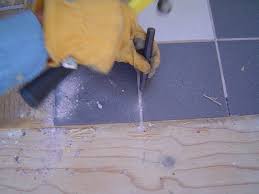
| Step 4 – Removing the Old Ceramic Tile Adhesive
With the old tile removed, now remove the old ceramic tile adhesive. Use a scraper or your screwdriver/chisel to remove the adhesive. Step 5 – Install New Ceramic Tile With the old tile and adhesive removed you can now install a replacement one. If the tile removed was a whole tile piece then simply apply some adhesive to the wall and to the back of the ceramic tile with a putty knife and push into place. You may want to use some spacers to hold the tile in place for the appropriate grout lines. |
 |
If the removed ceramic tile was a partial tile, because for example it went around a faucet, then you may need to use some tile nippers to shape the new tile to the opening of the removed tile space.
Let the adhesive set up over night and then install grout around the tile the next day.
For information on installing a shower pan membrane liner for a ceramic tile shower, see the Shower Pan Membrane Liner Installation Ebook from HomeAdditionPlus.com. The Shower Pan Membrane Liner EBook will quickly teach you the step-by-step process for installing the shower pan membrane liner correctly. It includes instructions on framing the shower stall, pouring the pre-slope and shower base mortar, and installing the shower pan membrane liner.
See HomeAdditionPlus.com’s Ceramic Tile Calculator
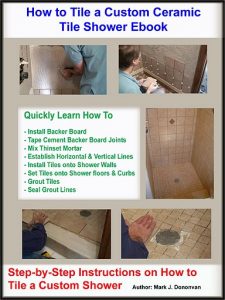
See my “How to Tile a Custom Ceramic Tile Shower” Ebook to learn how to tile your own shower: For a detailed set of instructions on tiling a shower floor and walls, including pictures for every step in the process, see my “How to Tile Custom Ceramic Tile Shower Ebook”.
Related Information
Additional Ceramic Tile Resources from Amazon.com
 |
 |
 |
Get Free Bathroom Remodeling Price Quotes with No Obligation!
Fill out our 3-5 minute quick and easy form, and receive a free price quote on a bathroom remodeling project from one of our pre-screened and licensed bathroom remodeling contractors. This process is free and there is no obligation to continue once you receive your bathroom addition price estimate.