How to Instructions on Decorating and Painting Ceramic Tile
By Mark J. Donovan
|
|
Ceramic tile can go out of style. Just look at a pastel pink or blue ceramic tiled bathroom from the 1950’s and you’ll know what I mean. Ripping out the old and outdated tile is not necessarily your only option. Painting and decorating tile is a cheaper and easier solution for reviving old and outdated ceramic tile. Decorating and painting tiles is most often done on wall tiles, however I’ve also seen it done on tiled kitchen and bathroom countertops. With a paint brush and your favorite paint colors, and a couple of afternoons, you can transform a faded or worn out tiled surface into a thing of beauty. So if you’re on a limited budget and want to breathe new life into your old ceramic tiles, rest assured you can do so with just a little time and a paint brush and paint. |
Prepping Tiles for Painting and Decorating
First, place drop clothes on the floor and around the work area where you plan to paint. Also use masking tape to protect surface areas you do not want to accidentally paint. Then fill any empty grout lines with any color grout you may have handy. The color won’t matter since you’re going to paint over it. In addition, replace any broken tiles and repair any cracks or imperfections in the ceramic tile that you plan to paint.
After touching up the ceramic tile, use a very fine grit sand paper too lightly sand the tiled surface. Lightly sanding the ceramic tile helps with the adhesion of the paint primer and paint to the ceramic tile. Wipe up and vacuum the dust off the tiles when you’ve completed the sanding.
| Afterwards clean the ceramic tile surface thoroughly and allow it time to fully dry. To thoroughly clean the tiles use Trisodium Phosphate (TSP). Mix the TSP with water per the TSP manufacturer’s recommendations. Also, make sure to wear gloves and eye protection when using TSP, and make sure the room is ventilated. Use a sponge to apply the cleaning solution and use some elbow grease to really work it into the tile and grout. Afterwards rinse the tiled surface several times with clean water to remove all of the loosened dirt and scum.
Finally, use a cloth to apply denatured alcohol to the tile surface to ensure every bit of dirt and grime has been removed. |
 |
After cleaning the tiles, typically you’ll want the tiles to dry for 24 to 48 hours before painting. If the tile surface is not thoroughly clean and dry the paint will not adhere well and you’ll eventually end up with chipping and flaking paint.
Painting Tiles
The first step in actually painting tiles is to apply a paint primer. The paint primer helps to ensure a solid bond between the tiles and the paint itself. For best results, apply two coats of primer to the tile.
First use a paint brush to cut around the perimeter of the ceramic tile surface area. Then follow behind with a low-nap paint roller to apply primer to the main tiled surface area. After the first coat of primer has fully dried, which could take several hours, repeat the process again. Once the second coat of primer has been applied let it dry for 24 hours before actually painting the tiles.
After the second coat of primer has fully dried, once more use a paint brush to apply the first coat of paint around the perimeter of the tiled surface area. Again, this process is known as cutting. Next use a low-nap roller to apply the paint to the main tile surface area and allow the paint to dry. Again this could take another 24 hours for the paint to fully dry.
After the first coat of paint has fully dried repeat the process again of cutting and applying paint to the ceramic tile. Once the second coat of paint has fully dried, you can now move onto the tile decorating phase.
Decorating Tile
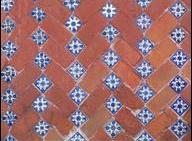
If you would like to recreate the grout line look on your freshly painted tiled surface use a contrasting paint color and a fine artisan paint brush to paint over the grout lines. Also, if you are artistic with the artisan paint brush, feel free to paint individual tiles with different paints and patterns to create accent tiles.
Sealing the Decorated and Painted Tile
After allowing the paint to fully dry, apply a urethane finish over the tiles to seal in the painted ceramic tiled surface. After several days of drying your newly painted and decorated tile will be ready for use.
For information on installing a shower pan membrane liner for a ceramic tile shower, see the Shower Pan Membrane Liner Installation Ebook from HomeAdditionPlus.com. The Shower Pan Membrane Liner EBook will quickly teach you the step-by-step process for installing the shower pan membrane liner correctly. It includes instructions on framing the shower stall, pouring the pre-slope and shower base mortar, and installing the shower pan membrane liner.
See HomeAdditionPlus.com’s Ceramic Tile Calculator
See my “How to Tile a Custom Ceramic Tile Shower” Ebook to learn how to tile your own shower: For a detailed set of instructions on tiling a shower floor and walls, including pictures for every step in the process, see my “How to Tile Custom Ceramic Tile Shower Ebook”.
Related Information
Additional Ceramic Tile Resources from Amazon.com
 |
 |
 |
Get Free Bathroom Remodeling Price Quotes with No Obligation!
Fill out our 3-5 minute quick and easy form, and receive a free price quote on a bathroom remodeling project from one of our pre-screened and licensed bathroom remodeling contractors. This process is free and there is no obligation to continue once you receive your bathroom addition price estimate.
