Step-by-Step Instructions for Replacing a Broken Ceramic Floor Tile
By Mark J. Donovan
|
|
Occasionally a ceramic floor tile will break and when this happens you have two choices, either leave it as is, or replace it. My vote is to replace it, as replacing a broken ceramic floor tile is not as difficult to do as you may think. Broken ceramic floor tiles are common in kitchen and entrance ways where there is a higher risk of dropping a large item on the floor. Left alone a broken floor tile can become unsightly and detract from the value of your home. Fortunately with a few basic tools and a little work you can easily replace your own broken ceramic floor tile.
To replace a broken ceramic floor tile first make sure you can obtain a replacement one. |
There’s no point in completely destroying the existing cracked ceramic floor tile if you do not have one to replace it with.
The chief concern when replacing a broken ceramic floor tile is to not damage the surrounding tiles. To this point it is helpful to apply masking tape over the adjacent ceramic floor tiles. The masking tape provides at least a little protection to the neighboring ceramic tiles.
This is where you need to exercise some caution to not damage the adjacent ceramic tiles.
Once you have removed the broken ceramic floor tile, use your chisel and hammer to remove any residual thinset mortar and/or grout from the affected area.
Use a dust pan and broom, or a vacuum cleaner, to pick up all of the broken ceramic floor tile pieces and dust.
| Next, apply thinset mortar to the subfloor using a notched trowel. In addition, back butter the replacement ceramic floor tile. Back-buttering involves using your trowel and applying a thin layer of thinset mortar to the back of the ceramic tile. Back-buttering ensures a complete and solid bond to the subfloor.
Next, place your replacement ceramic floor tile onto the subfloor and gently push and maneuver it into place relative to the adjacent floor tiles. Make sure to position the tile such that it will have grout lines consistent with the neighboring ceramic floor tiles. |
 |
Also make sure the replacement ceramic floor tile is at a height that is consistent with the other neighboring floor tiles. If it is too high, simply remove some of the thinset mortar on the subfloor. If it is too low, add some additional thinset mortar to the subfloor.
Allow the thinset mortar to set up for approximately 24 hours before grouting.
Finally, apply grout around the replacement ceramic floor tile and wipe the excess grout away with a moist sponge. You will probably need to wipe the new floor tile down with the sponge several times over a 30 minute period, so it may be helpful to have a bucket of fresh water nearby.
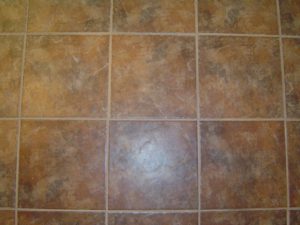
Once the grout lines have dried your ceramic tile floor should look as good as new.
For information on installing a shower pan membrane liner for a ceramic tile shower, see the Shower Pan Membrane Liner Installation Ebook from HomeAdditionPlus.com. The Shower Pan Membrane Liner EBook will quickly teach you the step-by-step process for installing the shower pan membrane liner correctly. It includes instructions on framing the shower stall, pouring the pre-slope and shower base mortar, and installing the shower pan membrane liner.
See HomeAdditionPlus.com’s Ceramic Tile Calculator
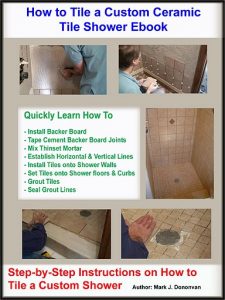
See my “How to Tile a Custom Ceramic Tile Shower” Ebook to learn how to tile your own shower: For a detailed set of instructions on tiling a shower floor and walls, including pictures for every step in the process, see my “How to Tile Custom Ceramic Tile Shower Ebook”.
Related Information
- How to Remove a Broken Ceramic Tile
- How to Regrout Bathroom Wall Tile
- Finding Matching Replacement Tile
Additional Ceramic Tile Resources from Amazon.com
 |
 |
 |
Get Free Bathroom Remodeling Price Quotes with No Obligation!
Fill out our 3-5 minute quick and easy form, and receive a free price quote on a bathroom remodeling project from one of our pre-screened and licensed bathroom remodeling contractors. This process is free and there is no obligation to continue once you receive your bathroom addition price estimate.