How to use Thinset Mortar when Installing Ceramic Tile Flooring
By Mark J. Donovan
|
|
When installing ceramic tile flooring, you should use a thinset mortar versus an organic mastic adhesive. Though mastic comes ready-made and is easy to use, it does not stand up to the rigors required of ceramic tile flooring, even Type 1 Mastic.
Thinset mortar basically consists of Portland cement, sand and methylcellulose. The methylcellulose is used to slow the curing process to enable the tiles to be set. The thinset mortar requires mixing with water and sometimes an acrylic latex additive if additional bonding strength is required. |
It is much more durable than even Type 1 Mastic, and is ideal for water prone areas.
There are a number of thinset mortar manufacturers and products. I would suggest staying away from the fast setting thinset mortars unless you are well familiar with the process of installing ceramic tile flooring.
You should read the instructions on the thinset mortar package to determine the right ratio mixture of water and thinset, however here are a few basic tips:
|
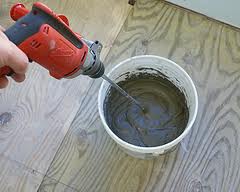 |
When installing ceramic tile flooring mix up only enough thinset mortar for about 30-60 minutes of ceramic tile installation.
One 50 pound bag of thinset mortar will cover an area of approximately 75-100 square feet, using a ¼” or 3/8” square notched trowel.
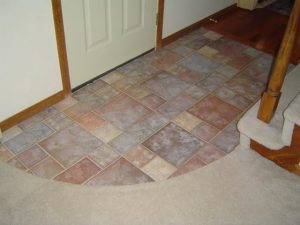
| When installing the ceramic tile flooring, make sure you wipe away the thinset mortar from around the edge of the tiles using a slightly damp rag or a toothbrush. Otherwise, you will either spend an inordinate amount of time scraping away the thinset mortar after it dries or have the mortar visible as it pokes out around the grout lines.
If you are planning to use a light color grout you should use white thinset mortar, and if you are planning to use a dark grout color you should use a gray thinset mortar. After installing the ceramic tile flooring allow 24-48 hours for the mortar to set up thoroughly. |
 |
For information on installing a shower pan membrane liner for a ceramic tile shower, see the Shower Pan Membrane Liner Installation Ebook from HomeAdditionPlus.com. The Shower Pan Membrane Liner EBook will quickly teach you the step-by-step process for installing the shower pan membrane liner correctly. It includes instructions on framing the shower stall, pouring the pre-slope and shower base mortar, and installing the shower pan membrane liner.
See HomeAdditionPlus.com’s Ceramic Tile Calculator
See my “How to Tile a Custom Ceramic Tile Shower” Ebook to learn how to tile your own shower: For a detailed set of instructions on tiling a shower floor and walls, including pictures for every step in the process, see my “How to Tile Custom Ceramic Tile Shower Ebook”.
Related Information
Additional Ceramic Tile Resources from Amazon.com
 |
 |
 |
Get Free Bathroom Remodeling Price Quotes with No Obligation!
Fill out our 3-5 minute quick and easy form, and receive a free price quote on a bathroom remodeling project from one of our pre-screened and licensed bathroom remodeling contractors. This process is free and there is no obligation to continue once you receive your bathroom addition price estimate.