How to Repair Masonite House Siding without Having to Re-Side the Entire Side of a House
By Mark J. Donovan
|
|
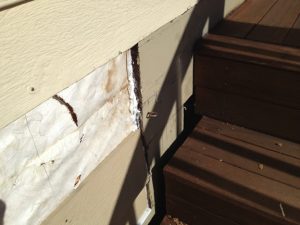
Due to roof water splashing off of my deck I had to tackle a Masonite house siding repair project. The Masonite house siding had become spongy and punky. It was so bad I could push my finger through it with no effort whatsoever.
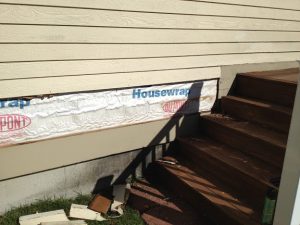
Repairing Masonite house siding can be a bit tricky, particularly when you only want to replace and patch in a small section of it. In my case, I needed to replace the bottom 4 rows of house siding. Removing Old Masonite House Siding Clapboards I decided to first remove the 3rd row from the bottom clapboard. |
This allowed me the ability to mess up the 4th and last row above it as I used my pry bar and claw hammer to lift it up and pull it out. In the end I had to employ a Sawzall to cut the house siding nails.
I then used the backside of my pry bar and hammer to pound down the cut nails underneath the bottom edge of the 5th row of clapboards. I wanted to make sure they were flattened down so that I could easily slide the new Masonite house siding clapboards up underneath the 5th row.
Installing New Masonite House Siding Clapboards
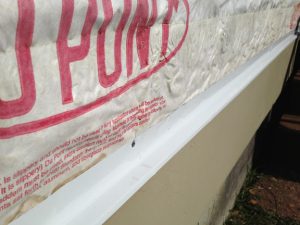
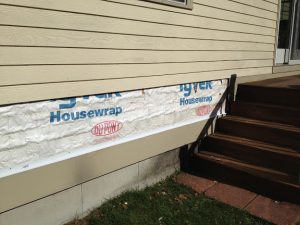
So with all of the old and rotted clapboards and drip edge removed I next installed new drip edge along the top edge of the bottom trim board where the first row of clapboards rested on. I installed galvanized nails about 1-1/4 inch from the bottom of the drip edge on every wall stud location.
 |
 |
Next I began the process of installing the new Masonite house siding. To do this I cut pieces to length such that I left about 1/8th inch of space on each end of it. You don’t want the Masonite house siding pieces to fit so tightly that they can’t expand. If you do so, the Masonite house siding will buckle during hot days.
 |
 |
I then started with the installation of the bottom row, or first row, of clapboards. I used galvanized siding 8d nails to secure the house siding to the side of the home. I installed the nails approximately 1 inch down from the top of the house siding and on every wall stud location. However, before sliding the piece of house siding into place, I ran a bead of paintable silicone caulk on the edges where the clapboard piece abutted.
|
 |
Next I made a pencil mark 4-1/2 inches up from the bottom of the length of house siding installed. I made marks along each wall stud line so that I could have easy reference points to place the second piece, row, of clapboards.
With the first piece marked, I cut a second length of Masonite house siding and position it in place. Again, I installed nails 1 inch down from the top of the piece of house siding, and at every wall stud location.
 |
 |
I repeated this process for the remaining two pieces of Masonite house siding. With the last piece I had to slide it up underneath the 5th row of house siding. I then installed nails into the 5th row of house siding about 1 inch from the bottom edge of the clapboard. I also made sure to place the nails into the old nail holes on the 5th row.
| I then went back and installed additional nails into the bottom edges of the next 3 clapboards. I did not install one in the newly installed bottom row as I didn’t want to put a bunch of nail holes in the newly installed drip edge.
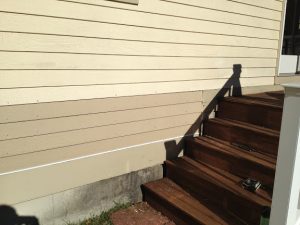
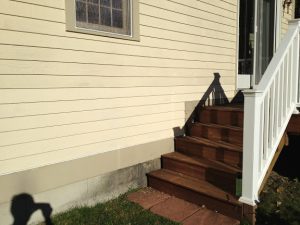
Finally I applied two coats of paint to the newly installed Masonite house siding clapboards to wrap up the project. That’s all there is to it for Masonite house siding repair. It took me only 3 hours to do the entire project. |
|
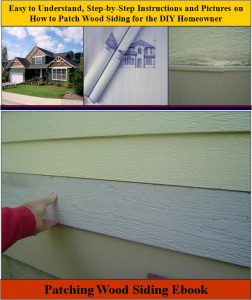
Patching Wood Siding Ebook – If you require detailed instructions and pictures for patching wood siding see HomeAdditionPlus.com’s Patching Wood Siding Ebook. This Ebook provides very detailed instructions, along with pictures for each key step in the process of patching wood siding.
Related Information
- How to Repair Wood House Clapboard Siding
- How to Clean Vinyl House Siding
- How to Clean Wood House Siding
Get Free Siding Price Quotes with No Obligation!
Fill out our 3-5 minute quick and easy form, and receive a free price quote on home siding from one of our prescreened and licensed siding contractors. This process is free and there is no obligation to continue once you receive your home siding estimate.