When it comes to Roofing Shingling a Valley is the Toughest Part
By Mark J. Donovan
|
|
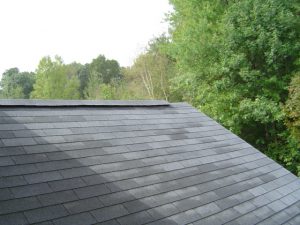
Shingling a valley is the most complex part of a roof shingling project, as it involves the shingling of one roof line and tying it into another. Shingling a valley can be done in a number of ways. Shingling valleys can be done by the open valley approach or the closed valley approach.
Shingling a valley in the open valley approach involves forming a channel for the water to flow down, where as shingling a closed valley involves completely shingling over the valley. |
Shingling Open Valleys
With open valleys, shingles overlap into a flashing material channel that allows water to run through. The width of the flashing material should be a minimum of 4-6 inches wide near the top of the valley, and widen as it approaches the roof eve, or if you desire a consistent open valley width the channel should be wider and consistent in width throughout the entire length of the valley.
The reason for needing a wider channel near the lower portion of the valley is that this area sees a higher volume of water than near the top of the valley. If there is too much water flowing through the channel there is the risk of water pushing up under the shingles near the edge of the metal flashing. One reason for having a widening valley is it is less prone for forming ice dams.
| When shingling open valleys with asphalt shingles, metal flashing or rolled roofing is used to form the open valley. Metal flashing is typically 24 inches wide and rolled roofing is 36 inches wide.
When shingling an open valley with metal flashing, an Ice and Water shield should first be applied to the valley. Ice and water shields seal around nails that puncture them and thus prevent leaks. |
 |
The metal flashing should then be installed over the Ice and Water shield. Metal flashing does expand and contract with temperature so it is best to install the metal flashing in the roof valley in sections that do not exceed 10 feet in length. The metal flashing sheets should be installed so that they overlap each other by several inches, and with the upper piece resting over the bottom piece. Roofing cement should be used to seal the two sections of metal flashing together and nails should be installed along the edges of the metal flashing. Again the Ice and Water shield will prevent any water leaks.
When shingling an open valley using rolled roofing, an 18” wide section of rolled roofing should first be installed into the valley, followed by a 36” wide section. The 18 inch wide section should be placed into the valley with its mineral surface laid face down, and the 36 inch wide section should be placed on top of it with its mineral side facing up. In addition, and similar to metal flashing, the top piece should overlap the lower piece and should be sealed with a roofing cement.
Finally, after trimming the roofing shingles near the valley to evenly expose the flashing, roofing cement should be applied on the underside of the bottom edges of the shingles near the valley. This will help prevent water from sliding up and underneath them.
| Shingling Closed Valleys
Closed valleys have no channel or flashing material exposed. Instead, shingling closed valleys involves the weaving of shingles between one roof plane and another. This said an Ice and Water shield is installed in the valley first. The advantages of shingling a closed valley with the woven technique are that no cutting is required, no roof cement is required, and it is the most weather resistant. On the downside, it is more tedious and complicated to install as both roof planes need to be done at the same time. Depending upon the types of shingles being installed you may want to work your way into the valley or out of it. |
Use this roofing installation checklist to save time and money on your roofing project. |
With 3-tab shingles it is best to work your way into the valley. With laminated shingles you can work your way out of the valley. In the ensuing sections I am referring to shingling with 3-Tab shingles.
Basically shingling a closed valley involves shingling a roof plane through the valley and up over and into the other roof plane by approximately 12 inches (a full tab with 3-Tab asphalt shingles). As you work your way up the valley the shingles passing through the valley are woven into place. This is accomplished by tying in and weaving into the valley both roof planes simultaneously. To do this, one shingle of one roof plane over laps the other roof plane, and then you move up a tier and alternate the process. This creates the weaving pattern.
It is important that during the weaving process, that no nails are installed within 6 inches of the valley and that the shingles are pushed snugly into the valley. If the shingles are not properly pushed down into the valley bridging will occur such that an air pocket is created underneath the valley. When someone steps on this air pocket the shingles could be cracked or damaged. Ideally shingling closed valleys should be done on warm days so that the asphalt shingles are more malleable.
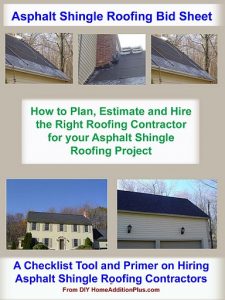
For more help on Shingling Your Home’s Roof, see HomeAdditionPlus.com’s Asphalt Shingle Roofing Bid Sheet. The Asphalt Shingle Roofing Bid Sheet will help to ensure that your roof won’t end up with a blue tarp over it and a dumpster sitting in your yard for weeks as you wait for the roofing contractor to come back and finish roofing your home.

Asphalt Shingle Roofing Cost Estimator
Related Roofing Information
- The Importance of Soffit Vents
- The Importance of Ridge Vents
- How to Shingle Roof Valleys
- How to Clean Roof Valleys
Additional Roofing Resources from Amazon.com
 |
 |
 |
 |
Roofing Price Quotes For FREE, No Obligation!
Fill out our 3-5 minute quick and easy form, and receive a free price quote on roofing from one of our prescreened and licensed roofing contractors. This process is free and there is no obligation to continue once you receive your roofing price estimate.