How to Repair a Rocking Toilet
By Mark J. Donovan
|
|
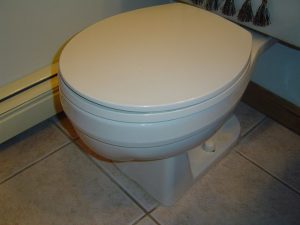
A rocking toilet can be the source of water leaks and odor problems in your bathroom. A rocking toilet could simply be caused by the toilet mounting bolts not adequately tighten. It could also be due to an uneven bathroom floor underneath the toilet or a damaged toilet flange. No matter what the cause, rocking toilet repair is essential. If left unchecked the toilet bowl could eventually crack, water leaks could occur, and a subtle odor may become persistent.
The simplest and easiest rocking toilet repair that you can attempt is to gently tighten up the toilet mounting bolts. However, be very careful to not over-tighten them as you could cause the toilet bowl to crack. |
If you are convinced the toilet mounting bolts are snug with the toilet bowl surface, try placing small wooden shims underneath the edge of the rocking toilet. Use a utility knife to remove any excess shim material, and use a hammer and common screwdriver to gently tap the shim so that it sits slightly recessed underneath the bottom of the toilet bowl. Then apply a bead of bathroom silicone caulk around the base of the toilet bowl.
| If the toilet rocking is significant, e.g. more than 1/8th inch of play, then I would highly suggest removing the toilet and inspecting the area underneath the toilet and around the toilet flange.
When removing a toilet, make sure to first turn off water to the toilet and fully drain the toilet tank and bowl. Then remove the toilet mounting bolts, and lift the entire toilet assembly carefully up and out of the way. A second pair of hands can be very useful during this stage. |
 |
| Set the toilet aside and inspect the area underneath the toilet area to make sure it is level. Also make sure the toilet flange is not damaged in any way.
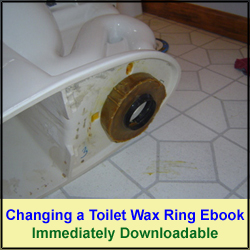
Assuming the floor is level and the toilet flange is fine, install a new toilet wax ring to the base of the toilet bowl and re-install the toilet. Make sure when re-installing the toilet that you slightly twist the toilet back and forth onto the toilet flange and press it firmly into place. Then fasten the toilet down with the toilet mounting bolts. If there is still a bit of rocking toilet “syndrome” going on, then use the shim and caulk rocking toilet repair method to resolve the problem. |
 |
For information on installing a shower pan membrane liner for a ceramic tile shower, see the Shower Pan Membrane Liner Installation eBook from HomeAdditionPlus.com. The Shower Pan Membrane Liner EBook will quickly teach you the step-by-step process for installing the shower pan membrane liner correctly. It includes instructions on framing the shower stall, pouring the pre-slope and shower base mortar, and installing the shower pan membrane liner.
For information on how to tile a custom ceramic tile shower, see the “How to Tile a Custom Ceramic Tile Shower eBook” from HomeAdditionPlus.com. This eBook will quickly provide you with step-by-step instructions on how to measure and install ceramic tile in a shower, including the installation of tile on shower walls, floors and curbs. It provides detailed instructions for every step in the process of tiling a custom ceramic tile shower and is loaded with instructional pictures!
Related Information
Additional Plumbing Resources from Amazon.com
 |
 |
Get Free Bathroom Remodeling Price Quotes with No Obligation!
Fill out our 3-5 minute quick and easy form, and receive a free price quote on a bathroom remodeling project from one of our pre-screened and licensed bathroom remodeling contractors. This process is free and there is no obligation to continue once you receive your bathroom addition price estimate.