Step-By-Step Instructions for Replacing a Leaking Bathtub Faucet Valve Stem
By Mark J. Donovan
|
|
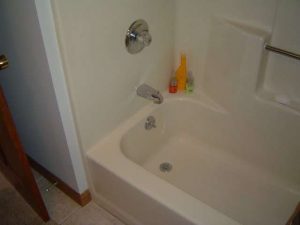
If your bathtub faucet has a continuous slow leak then chances are the bathtub faucet valve stem is worn out or is damaged in some way. The bathtub faucet valve stem plays a very important role in controlling the water flow out of your bathtub water spout. When you turn the faucet handle to the on or off position a rubber washer at the end of the stem rises or falls to control the water flow out of the bathtub spout. Over years this rubber washer can wear out and cause the bathtub faucet to leak.
If you’re reasonably handy you can perform your own DIY leaky bathtub faucet valve stem replacement. All you need are a few basic household tools that include a Philips screwdriver, a flathead screwdriver and an adjustable wrench. |
You’ll also need a replacement bathtub faucet valve stem that matches the existing one.
To change out the leaky bathtub faucet valve stem first turn off the water supply to the bathtub faucet. There may be an access panel located behind the faucet, such as in an adjacent bathroom closet. If there is no access panel, then you’ll have no choice but to turn water off to the entire house or apartment.
| Once you’ve turned off the water to the bathtub faucet remove the screw cap cover that hides the screw that holds the handle to the faucet. The screw cap covers typically are labeled hot and cold if there are two separate handles for the bathtub faucet. If there is one handle for the faucet then there should be a single screw cover over the center of it.
Next use the Philips screwdriver to remove the screw(s) that hold the bathtub faucet handle to the valve stem assembly. After removing the screw(s) pull on the handle to remove it from the valve assembly. |
 |
Now use your adjustable wrench to remove the hexagonal packing nut located over the valve stem. After removing the nut remove the old leaky bathtub faucet valve stem with your fingers.
| You may need the help of the flathead screwdriver to pry it out.
Apply a dab of silicone grease to the threads of the valve socket and then insert the replacement bathtub faucet valve stem into the valve socket. Thread the packing nut over it and tighten snuggly with the adjustable wrench. Reattach the faucet handle to the end of the bathtub faucet valve stem using the handle screw and a Philips screwdriver. Finally turn water back on to the bathtub faucet and test it out. With any luck your leaky bathtub faucet valve stem problem is history. |
 |
For information on installing a shower pan membrane liner for a ceramic tile shower, see the Shower Pan Membrane Liner Installation eBook from HomeAdditionPlus.com. The Shower Pan Membrane Liner EBook will quickly teach you the step-by-step process for installing the shower pan membrane liner correctly. It includes instructions on framing the shower stall, pouring the pre-slope and shower base mortar, and installing the shower pan membrane liner.
For information on how to tile a custom ceramic tile shower, see the “How to Tile a Custom Ceramic Tile Shower eBook” from HomeAdditionPlus.com. This eBook will quickly provide you with step-by-step instructions on how to measure and install ceramic tile in a shower, including the installation of tile on shower walls, floors and curbs. It provides detailed instructions for every step in the process of tiling a custom ceramic tile shower and is loaded with instructional pictures!
Related Information
- How to Install an Adjustable Shower Drain
- How to Fix Leaking Shower on Upper Level Floor
- How to Fix a Shower Leak
Additional Plumbing Resources from Amazon.com
 |
 |
Get Free Bathroom Remodeling Price Quotes with No Obligation!
Fill out our 3-5 minute quick and easy form, and receive a free price quote on a bathroom remodeling project from one of our pre-screened and licensed bathroom remodeling contractors. This process is free and there is no obligation to continue once you receive your bathroom addition price estimate.