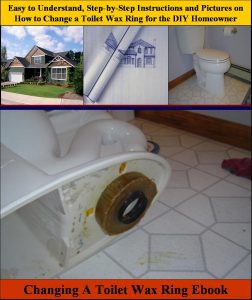
Step by Step Instructions on How to Replace a Toilet Wax Ring
By Mark J. Donovan
|
|
Are you seeing a small puddle of water form around the base of your toilet after your flush it? Or, is there a bad smell that seams to be frequently present in your bathroom, even when no one has used the bathroom for long periods of time?
If so then chances are the toilet wax ring has failed. What is a toilet wax ring? As the name suggests it’s a thick 1 to 2 inch ring of wax that sits underneath the toilet bowl and that normally forms a water and air tight seal between the toilet bowl and the toilet flange. |
The toilet flange is a PVC or cast iron pipe opening in the bathroom floor where the toilet waste water goes.
When the toilet is flushed waste water from the toilet bowl flows through the toilet flange and into the plumbing drain system.
At the base of the toilet wax ring is a funnel shaped piece of plastic. This plastic funnel shape helps to guide the toilet wax ring onto the toilet flange.
So what causes a toilet wax ring to fail? If the bathroom floor, which upon the toilet sits, is not completely flat the toilet will rock when people sit on it. Overtime this rocking motion can cause the toilet wax ring to break down and eventually fail. When it does fail, every time someone flushes the toilet a small amount of waste water seeps through it as the toilet bowl empties into the toilet flange and drain system.
This seepage shows up around the base of the toilet. Also, because the toilet wax ring is no longer water or air tight, sewer gases can drift up and out around the base of the toilet. As a result, a constant foul odor in the bathroom can be smelled.
| If the toilet wax ring is not replaced when these issues are detected the bathroom floor could become damaged, and unsafe methane sewer gases could build up in the home. Fortunately changing a toilet wax ring is inexpensive and easy to do.
You can buy a toilet wax ring at any home improvement center for just a few dollars, and any homeowner with a few simple tools can replace one. In less than an hour a homeowner can change a toilet wax ring. |
 |
Changing out Toilet Wax Ring
To change a toilet wax ring, start by turning off the water supply line to the toilet. The supply line valve is typically located adjacent to the toilet.
Turn the valve to the off position and then flush the toilet to see if water drains from the tank and bowl and that no new water enters the tank.
Then remove any residual water from the toilet tank using a large towel and a bucket.
Once the toilet tank is empty disconnect the toilet supply line from the base of the toilet tank using a pair of channel lock pliers.
If you can be careful, you can leave the toilet tank attached to the toilet bowl to speed up changing the toilet wax ring. My directions below assume you will.
Lay a couple of large towels on the bathroom floor near the toilet.
| Next, remove the anchor nuts that are attached to the two toilet flange hold-down bolts that come out from the base of the toilet bowl. Use a crescent wrench for this task.
Now this is where you need to be careful and gentle. Carefully lift the toilet tank and bowl up as one unit and gently lay the entire unit on the towels so that the base of the toilet bowl is observed. |
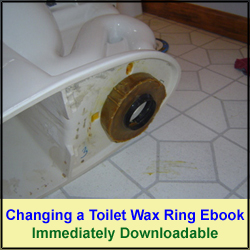 |
If you are not careful you could crack the toilet tank or bowl where the bolts that attach the two sections together.
If you are nervous about lifting up the two attached units as one, or feel you can’t lift the combined weight of the toilet tank and bowl, remove the bolts that connect the two units and lift the toilet tank off the bowl. Then lift the toilet bowl off the toilet flange. Lay both units onto the towels with the base of the toilet bowl exposed to see the toilet wax ring.
Scrape off Old Wax Ring
Using a putty knife scrape off the old toilet wax ring. Make sure you are thorough in removing any residual wax from the old ring. Also remove any wax ring material from the toilet flange area and the adjacent bathroom floor area.
| Install New Toilet Wax Ring
Now, firmly push the new toilet wax ring into place around the base of the toilet bowl opening. You’ll notice there is a lip around the toilet bowl opening that forms a natural guide for the placement of the toilet wax ring. With the new toilet wax ring in place carefully lift the toilet tank and bowl up and put them back into place over the toilet flange. |
|
Make sure to line up the toilet anchor bolts with the two openings in the base of the toilet bowl as you place the toilet.
After placing the toilet back onto the toilet flange, gently rock and push down on the toilet bowl to properly seat the toilet wax ring. Even sit on the toilet to help to firmly seat the toilet bowl.
Once you’re convinced yourself the toilet is seated properly and is flush with the bathroom floor re-attach the nuts to the toilet anchor bolts using a crescent wrench. Make sure not to over-tighten the nuts or else you could crack the toilet bowl.
Reconnect Toilet Supply Line
Now connect the toilet supply line back to the base of the toilet bowl. Use your channel lock pliers to gently tighten the nut that holds the line in place.
Lastly, turn the toilet water supply line back on and observe that the toilet tank fills up. When the toilet tank is full, flush the toilet and check to see if there are no leaks around the base of the toilet bowl. Repeat this step a couple of more times. With any luck you’ll find you’ve successfully changed a toilet wax ring.
One final note, any time you need to temporarily remove a toilet, e.g. installing a bathroom ceramic tile floor, always reinstall the toilet with a new toilet wax ring.
For information on installing a shower pan membrane liner for a ceramic tile shower, see the Shower Pan Membrane Liner Installation eBook from HomeAdditionPlus.com. The Shower Pan Membrane Liner EBook will quickly teach you the step-by-step process for installing the shower pan membrane liner correctly. It includes instructions on framing the shower stall, pouring the pre-slope and shower base mortar, and installing the shower pan membrane liner.

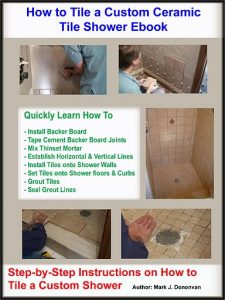
For information on how to tile a custom ceramic tile shower, see the “How to Tile a Custom Ceramic Tile Shower eBook” from HomeAdditionPlus.com. This eBook will quickly provide you with step-by-step instructions on how to measure and install ceramic tile in a shower, including the installation of tile on shower walls, floors and curbs. It provides detailed instructions for every step in the process of tiling a custom ceramic tile shower and is loaded with instructional pictures!
Related Information
- How to Replace a Toilet
- How to Resolve a Humming Toilet Tank Fill Valve Problem
- How to Install a Toilet Tank Fill Valve Video
Additional Plumbing Resources from Amazon.com
 |
 |
Get Free Bathroom Remodeling Price Quotes with No Obligation!
Fill out our 3-5 minute quick and easy form, and receive a free price quote on a bathroom remodeling project from one of our pre-screened and licensed bathroom remodeling contractors. This process is free and there is no obligation to continue once you receive your bathroom addition price estimate.