A Visit to Napa Valley inspired me to try my Hand at making my Own Homemade Wine
By Mark J. Donovan
|
|
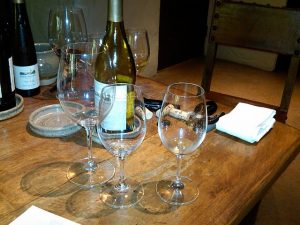
After visiting the Napa Valley California area recently, a place I had not been to in 24 years, I decided to try my own hand at making homemade wine. Though the tours of Beringer and Robert Mondavi’s vineyards and wineries provided me with some basic knowledge on how to make wine they were more inspirational than anything else. Consequently I found myself scouring the world-wide-web when I got back from my trip looking for homemade wine recipes. Boy there are a slew of fruits besides grapes that can be used to make wine.
Also, it appears everyone has their own unique recipes. I also talked with my father who’s made his fair share of wine over the years and he too had his own spin on what to do. |
Homemade Wine Making Kit
After about a week of investigation I found myself at the local wine brewery shop buying some basic equipment. Though they sold complete wine making kits, including grape juice, I wanted to experiment more and not stick to a rigid recipe from a box. Consequently I wound up cobbling together and buying my own personal homemade wine making kit.
| My personal homemade wine making kit included:
• 6 gallon plastic fermentation bucket, along with a lid |
 |
Homemade Wine Making Ingredients
The wine making ingredients I decided to go with were another matter. I wanted to make a grape wine that was somewhat dry. Also, I wanted to try table grapes from the super market, since specific wine grapes were not in season. Also, I felt if I could make a good grape wine using table grapes then I could make it more often and less expensively. I wound up choosing a dark red/black hybrid grape. From what I read you need anywhere from 10 to 20 lbs of grapes to make a gallon of wine. I wound up buying 9 lbs of grapes which after pressing them yielded just over a half a gallon of thick grape juice. Since the grape juice was so thick I elected to just add water to it, along with the yeast and sugar to get me to a gallon of wine. Hopefully the decision to dilute the grape juice won’t be an issue. Again, I wanted to experiment and this is exactly what I’m doing it.
| For my personal homemade wine making ingredients I used the following:
• 9 lbs of Black grapes that yielded about ½ gallon of grape juice Preparing the Wine for Fermentation After gently rinsing and cleaning the plastic fermentation bucket with C-brite cleanser I poured my grape juice into it. It is important that the fermentation bucket, as well as all wine making equipment that come in contact with the “Must”/Wine be clean and free from bacteria and germs. |
 |
Otherwise you may end up with very bad tasting wine. Also, C-brite cleanser is a fairly harsh cleaner so I wore rubber gloves and eye protection when washing out the fermentation bucket.
I then dissolved the yeast in a quart of tepid water and mixed it up. Afterwards I poured it into the “must”. The “must” is the grape juice along with grape skins and seeds. My particular batch of “must” was fairly free of skins and the grapes were seedless. I then dissolved 1.25 lbs of sugar into another quart of tepid water. Once the sugar was completely dissolved I poured it into my fermentation bucket and stirred it in thoroughly with the must. I then used the hydrometer to measure the specific gravity of the wine. This measurement is used for determining the wine’s alcohol content after it has fully fermented.
Finally, I put the air-tight lid on top of the fermentation bucket and installed the fermentation airlock to it, adding a little water to the airlock to create the air-tight seal.
Wine Fermentation Process
My batch of homemade wine is still a work-in-process as of the writing of this article. It has been fermenting about a week. A couple of times a day I swish the bucket around, while leaving the lid on it to mix up the “must” and to ensure a continued and even fermentation process. Somewhat amazingly you can hear and smell the fermentation process. Sizzling sounds actually can be heard if you put your ear next to the bucket. Also, you can smell the yeast/grape smelling carbon dioxide gas venting from the fermentation airlock.
I’ve decided to let the wine ferment in the fermentation bucket for about 2 weeks. I then plan to “rack” the wine by siphoning it into the 1 gallon glass carboy making sure to leave the sediments at the bottom of the plastic fermentation bucket.
After transferring the wine to the carboy I will then use the rubber stopper and fermentation air-lock to allow any additional fermentation to continue. I plan to allow this process to occur for another couple of weeks. At that point I will bottle the wine. I expect to make about 5 bottles of wine from the gallon.
Bottling Wine
From what I’ve read, again it is important that the empty wine bottles be sanitized prior to siphoning the wine into it. With some methods, it is recommend to “rack” the wine one last time and to transfer it to a wine filler bucket that includes a spigot at the bottom of it. I plan just to siphon, “rack”, the wine from the glass carboy to the wine bottles.
After filling the wine bottle and allowing room for a cork, I’ll cork the wine to complete the process.
My plan is to allow the wine to age for about 3 months before I try the first bottle. Depending upon the taste I may allow the other bottles to age another 3 to 9 months.
Stay tuned for taste results on my homemade wine in subsequent articles….
Dress Up Your Home’s Exterior with an Arbor – If you’ve always wondered what to do about a side door entrance to your house or garage to make it more appealing, or just wanted to simply spice up the backyard, building an arbor may be your answer. The “How to Build an Arbor Ebook” provides detailed, step-by-step instructions and pictures on how to build an entrance-way arbor for your home. Order and Immediately Download today!. 100% Money-Back Guarantee if you are not satisfied.
Planning to have a Brick or Paver Walkway Installed by a Landscaping Contractor but not sure what questions to ask to ensure you hire the right one? See HomeAdditionPlus.com’s Brick and Paver Walkway Bid Sheet. The Brick and Paver Walkway Bid Sheet will help ensure that your walkway project goes smoothly and you get the finished walkway you are looking for.
- How to Tap Maple Trees for Producing Maple Syrup
- Napa Valley Wine Tasting Tours
- How to Make Maple Syrup Video
Additional Landscaping Resources from Amazon.com
 |
 |
Free Home Addition Price Quotes with No Obligation!
Fill out our 3-5 minute quick and easy form, and receive a free price quote on a house addition from one of our prescreened and licensed home addition contractors. This process is free and there is no obligation to continue once you receive your house addition price estimate.