Part 3 of Building a Vacation Home on Lake Winnipesaukee (Framing Further Explained, and Rough Electric and Plumbing Occur)
By Mark J. Donovan
|
|
Follow-up on Framing Phase
To be complete with the framing phrase there are a few points that I wanted to bring up that I think are important if you plan to build your own dream home someday. First, I chose to use ¾ inch tongue and groove plywood for the subfloors, both on the first and second level floors. Often builders will use ¾ inch tongue and groove OSB (Oriented Strand Board). |
I am not as fond of OSB as it is more susceptible to water damage. Due to the fact I was having my dream home built during the dead of winter I just felt it wiser to stick with traditional plywood as it holds up better to water and ice exposure.
The last thing I wanted to contend with was warped subfloors caused by moisture exposure. I also still believe that plywood is a stronger and more durable product than OSB.
Similarly, I chose to use ½ inch CDX plywood for the exterior wall sheathing. Again, I could have used an OSB equivalent but decided to use the more traditional sheathing material used on homes constructed in the northeast part of the United States.
For the roof, 5/8th inch CDX plywood was used. Even here builders also use OSB sheathing for roof sheathing. But again, any exposure to water, either during the construction or due to an eventual roof leak, would most likely lead to sheathing warpage. The last thing I wanted to ever have to worry about looking at was a shingled roof with bulges in it due to warped OSB sheathing.
| For the exterior walls I used 2x6s, as is required by code for the northeast region of the country. It is critical to have sufficient wall insulation and one of the best ways to do so is to use 2x6s so that more insulation can be stuffed in between the wall stud bays.
For the interior walls 2x4s were used since no insulation is installed between the interior wall studs. |
 |
Due to the large size of the great room that faced the lake I also ended up using very long 2×12 roof rafters.
Initially I had planned to use 2x10s but the building inspector insisted upon the 2x12s. In the end I am glad he recommended the change. The larger lumber ensured a stronger roof.
Door and Window Installation
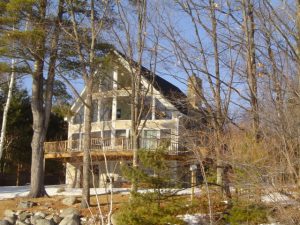
The installation of the windows in my dream home was a major endeavor. As I indicated in an early part of this documentary, the front side of the home facing the water was a wall of windows. Very large windows I might add. Windows that were 6’x 8’ in size in some cases. In addition some of the windows had custom trapezoid shapes to match the wall and roof lines. The 10 large custom designed windows fit like a puzzle and great care was needed in their installation.
To install the wall of windows scaffolding had to be brought in to help in the effort. Scaffolding was installed both inside and outside the home and rose 30 feet in the air on the outside of the home. Similarly it rose nearly 27 feet on the inside. The great room had vaulted ceilings that towered 27 feet above the first level floor.
It was during the window installation that I learned that there was a design flaw with some of the windows due to improper dimensional information provided to the building supplier. In the end the cost of replacing the wrong sized windows was split between the building supplier and me. The wrong windows fiasco also set me back a couple of weeks in buttoning up the house.
After the windows were all installed the framing crew also installed the exterior doors, including four 8 foot wide glass sliders.
| Shingling the Roof
The last step in buttoning up the home was shingling the roof. I chose to use a dark green architectural shingle for the roof. The shingles had a 30 year warranty on them. Instead of hiring a separate roofing contractor the same framing crew shingled the roof. |
 |
It took about two solid weeks to shingle the roof due to a couple of snowstorms that slowed the work progress. Though the roof was not complex, as it lacked valleys and had only one ridge peak, it was very large and had two shed dormer roofs that protruded out of the main field of shingles.
A cricket also needed framing and shingling due to a stone fireplace that protruded up one side of the home and above the roof edge by about ten feet.
Garage Construction
Once the main part of the home was buttoned up the framing crew began construction on the attached garage that appended to the back of the home. And while they began that phase of the construction project, I called in the electrician and plumber subcontractors to begin their work.
Rough Electric
Initially I had the electrician come in and review the house plans and mark all the locations for the various outlets, switches and light fixtures. We did this on both the inside an outside of the home. We also marked the locations for the cable and phone jacks.
In the ensuing days the electrician ran Romex cable to all the electrical outlets, switches and light fixtures and fed the other ends of the cables down to the main 200 amp circuit panel in the basement which he also installed. He also transferred the electrical service that was connected temporarily to a post outside the home into the main circuit panel. He also ran all the coaxial cable and phone wire to the various locations marked in the home.
|
Rough Plumbing It was a similar story with the plumber. He initially came into the buttoned-up home and reviewed and marked the locations for the toilets, tubs, showers, and sinks. He also identified where he’d run the vent stack and the drain pipes to the outlet pipe that fed outside to the septic tank. |
|
A couple of days later he was back on the jobsite with his crew and they began the task of running PVC drainage pipes and copper supply pipes throughout the house.
They also installed toilet flanges and drains, as well as shower drains. After about a week he had completed the rough plumbing to the kitchen and all the bathrooms and had all the drain pipes connected to the main vent stack and the main drainage pipe in the basement.
A week after the electrician and the plumber started their phases of the construction project they were wrapped up and the building inspector had approved their work.
To Be Continued ….
In Part 4 of “Building Your Dream House”, the insulation and drywall are done and the kitchen designer shows up on the jobsite. Also the house siding installation gets underway. Stay tuned………….
Related Information on Building Your Dream House
For more help on building a new custom home, see HomeAdditionPlus.com’s New Home Construction Bid Sheet. The New Home Construction Bid Sheet provides you with the knowledge on how to plan a custom home building project, and what to look for when hiring contractors for your new home construction. It also includes a detailed cost breakdown table and spreadsheet for estimating your own new home construction building costs.