Step by step Instructions on Installing Wire Shelves
By Mark J. Donovan
|
|
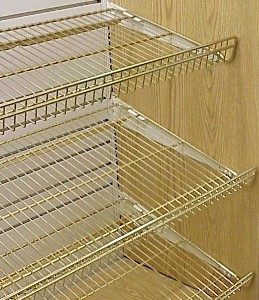
If you are in need of some additional shelf space in your closet or pantry, wire shelves are a great solution. A wire shelf can easily be installed by a homeowner. Typically a homeowner can install a wire shelf or shelves in an hour or two.
Tools required for Installing a Wire Shelf
|
Installing Wire Shelf and attaching to Wall Studs (The preferred Way)
To begin with make a pencil mark at the height of where you want the wire shelf to sit in the closet or pantry.
Next, place your level on the mark and use it as a guide for drawing a straight line for where you want the shelf to reside.
If you want the wire shelf to be capable of supporting a great deal of weight then you will want to find the studs to fasten the wire shelf screws to. For best strength you should install a wire shelf diagonal bracket every 32 inches along the length of the shelf. In addition, a diagonal bracket should reside on each end of the wire shelf. So for example, if you wanted to install a 64 inch long wire shelf you would install 3 diagonal brackets, two on the ends and one in the middle.
| Use a stud finder to help find the stud locations along the pencil line.
Once you have located the studs and where the diagonal bracket locations will lie along the pencil line, install the wire shelf anchor hooks that come with the wire shelf kit using your screw gun or screwdriver. Next, attach the back of the wire shelf to the wire shelf anchor hooks. The wire shelf should snap into the anchor hooks. Check to make sure the wire shelf is firmly and securely installed in the anchor hooks. |
 |
At the ends of the wire shelf and any other locations you specified for the diagonal brackets, attach the diagonal brackets to the front side of the wire shelf using the bracket assembly unit that came with the wire shelf kit.
Next, raise the shelf to a position so that is parallel to the floor. Use your level to make sure that it is level.
While holding the shelf level, attach the lower end of each diagonal bracket to the wall using screws, making sure each screw penetrates into the wall stud.
Once all of the brackets have been attached your wire shelf installation project is complete.
| Installing Wire Shelf into Drywall without attaching to Wall Studs
If you do not intend to put a great deal of weight on the wire shelf, you can eliminate the need for finding wall studs. In this case, simply use plastic expanding anchors to attach the wire shelf anchor hooks and diagonal brackets to the walls. |
 |
Again, once you have located the position of the shelf along the pencil line, simply drill a small pilot hole for installing the plastic expanding anchors. Use a hammer to gently tap the plastic expanding anchors so that they are flush with the drywall surface.
Next, install the back wire shelf anchor hooks into the plastic expanding anchors. Attach with screws using your screw gun or screwdriver.
Now attach the back of the wire shelf to the wire shelf anchor hooks. The wire shelf should snap into the anchor hooks. Check to make sure the wire shelf is firmly and securely installed in the anchor hooks.
At the ends of the wire shelf and any other locations you specified for the diagonal brackets, attach the diagonal brackets to the front side of the wire shelf using the bracket assembly unit that came with the wire shelf kit.
Next, raise the shelf to a position so that is parallel to the floor. Use your level to make sure that it is level.
While holding the shelf level, attach the lower end of each diagonal bracket to the wall using plastic expansion anchors and screws. Again, you will first need to make pilot holes and gently hammer the plastic expansion anchors flush with the drywall surface. The screws will attach the diagonal brackets to the plastic expansion anchors.
Once all of the brackets have been attached your wire shelf installation project is complete.
Dress Up Your Home with Crown Molding – For specific instructions on installing crown molding see the “Installing Crown Molding Ebook“. The “Installing Crown Molding Ebook” will show you how to properly measure, select, cut and install crown molding like a professional carpenter. It provides detailed instructions on every step in the process of installing crown molding and includes 28 instructional pictures! Order and Immediately Download today!. 100% Money-Back Guarantee if you are not satisfied.
For information on installing Window and Door trim see HomeAdditionPlus.com’s Installing Interior Window Trim Ebook and Installing Interior Door Trim Ebook. These Ebooks are loaded with pictures and provide easy to understand, step-by-step instructions, on how to install interior window and door trim.
Related Information
- Wire Shelving versus Wood Shelving
- Closet Organization Systems
- How to Install Wood Shelves in Closet
Additional Finish Carpentry Resources from Amazon.com
 |
 |
Free Home Addition Price Quotes with No Obligation!
Fill out our 3-5 minute quick and easy form, and receive a free price quote on a house addition from one of our prescreened and licensed home addition contractors. This process is free and there is no obligation to continue once you receive your house addition price estimate.