Learn the Simplest Way to Pull Romex NM cable through a Wall to a New Electrical Box
By Mark J. Donovan
|
|
Pulling Romex wire through a wall is easy to do as long as you have a fish tape, a drill and a ¾ inch spade bit. Before going through the task of pulling Romex cable, however, it is important that you first understand a little bit about Romex wire so that you pull the right type through your walls.
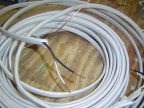
Romex cable is commonly used today in residential wiring. It was actually invented in the early 1920s. It is a non-metallic sheathed cable that typically carries three (14-2 or 12-2) or four (14-3 or 12-3) wires in it for residential applications. The first number in the parenthesis relates to the gauge of wire. |
A 14 gauge wire is rated for 15 amps and a 12 gauge wire is rated for 20 amps. The second number in parenthesis relates to how many sheathed wires are running in the cable. One wire is a bare ground wire. In addition, there is a sheathed white wire (neutral) and a sheathed black wire (hot). Also, a second sheathed hot wire (red) is provided in what is referred to as 14-3 or 12-3 Romex cable.
| Once you’ve chosen the right type of Romex wire for your electrical wiring project start by going up into the attic and drilling a hole with the ¾ inch spade bit into the 2×4 / 2×6 wall top plate. The hole should be positioned directly over the electrical box that you want to pull the Romex cable to.
Next, slide the fish tape through the hole in the top plate and down the wall towards the electrical box. As you thread the fish tape down the wall you may have to push and twist the plastic fish tape reel to work the fish tape through any insulation in the wall and to direct it towards the electrical box. |
 |
Continue to feed the fish tape down the wall until you can grab onto it at the electrical box.
Once you’re able to grab onto the fish tape from the electrical box attach the Romex wire to the fish tape end at the electrical box.
| Then, from the attic, pull the fish tape back towards you. As you do so you’ll pull the Romex wire through the electrical box, up the wall and eventually out the hole in the wall top plate.
Once you can grab onto the Romex wire in the attic continue to pull Romex cable until you have a length long enough to feed down to the power source. Next drill another hole in the 2×4 / 2×6 wall top plate directly above the power source location. Then thread the fish tape from the power source location up the wall and into the attic. |
 |
Now attach the Romex cable that you pulled into the attic to the fish tape end.
Finally, at the power source location, pull back on the fish tape to pull the Romex wire through the wall and to the power source location. You can then wire up the Romex cable to power the new electrical outlet or switch.
For help on building a new custom home, see HomeAdditionPlus.com’s New Home Construction Bid Sheet. The New Home Construction Bid Sheet provides you with the knowledge on how to plan a custom home building project, and what to look for when hiring contractors for your new home construction. It also includes a detailed cost breakdown table and spreadsheet for estimating your own new home construction building costs.
Related Information
- What is a Ground Fault Circuit Interrupter Breaker
- How to Rough in Electrical Wiring
- How to Test a Light Switch and Outlet Circuit
Additional Electrical Wiring Resources from Amazon.com
 |
 |
Free Home Addition Price Quotes with No Obligation!
Fill out our 3-5 minute quick and easy form, and receive a free price quote on a house addition from one of our prescreened and licensed home addition contractors. This process is free and there is no obligation to continue once you receive your house addition price estimate.