Tips for Adjusting Motion Activated Light Sensors
By Mark J. Donovan
|
|
Motion sensor lights are excellent for providing security around the exterior of your home. However, motion sensor controlled lights can be a little annoying when they are inadvertently triggered by windblown leaves, small animals and passing cars.
Fortunately, in most cases adjusting sensor lights is an easy DIY project, and with just a few minutes of effort you can prevent these types of inadvertent light triggers from happening. |
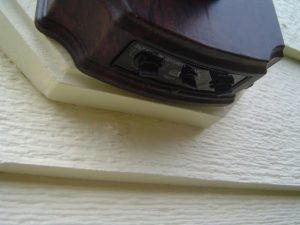
A motion activated light is controlled by a small infrared sensor integrated into either the light fixture itself or in a remote sensor unit.
Sometimes the remote sensor unit is collocated on the light fixture assembly, and other times it may actually be located somewhere else on the property.
The infrared sensor operates by detecting movement in infrared energy, or heat energy. When the infrared sensor detects heat movement it triggers the light fixture to turn on. An infrared sensor has what is referred to as a field of view.
The field of view is comprised of an angle range and a distance range. Motions sensors can have angle ranges from 0 – 360 degrees, however most motion activated lights with built in infrared sensors have angle ranges of 180 to 270 degrees. In terms of distance, most infrared sensors associated with motion activated lights have a range of 30 to 70+ feet.
 |
 |
Adjusting Sensor Lights
Before adjusting a motion sensor light it is best to read the operators manual thoroughly. Depending upon the particular motion sensor light there are a number of switches on it to control the infrared sensor sensitivity level.
Normally the switches are located on the bottom of the light fixture. You can adjust the sensor sensitivity level to limit the range of motion detection. In addition, you may be able to adjust the viewing angle of the infrared sensor on some light models. To adjust the motion sensor light put the light into “TEST MODE”. Once you have set the desired field of view you can then reset the light to normal “Operational Mode”.
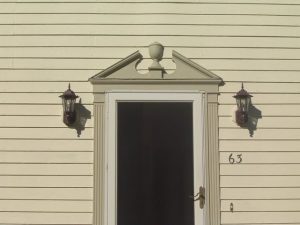
| As for actually installing a motion activated exterior light make sure to first read the instruction manual carefully. Most are installed exactly as a conventional light.
They typically have three wires that are designed to tie into your existing home’s wiring. The wires include a black wire (hot), a white wire (neutral), and a green or bare copper wire (ground). |
 |
When replacing a conventional exterior light with a motion activated exterior light, make sure that you first turn power off at the main circuit breaker box. In addition, use wire nuts to connect the house wires and light wires together. Also make sure that the light is properly grounded to the electrical box. Lastly, make sure you seal around the light fixture with a waterproof caulk.
|
If you desire a smaller viewing angle you can also apply black electrical tape over a portion of the infrared sensor. This will effectively reduce its infrared eye and thus prevent the light from triggering in certain directions. Besides adjusting the field of view, you can also adjust the amount of time the light remains on after being triggered by the infrared sensor. Depending upon the particular motion sensor light, you can adjust the length of time from 1- 20 minutes. |
|
In addition, you can also adjust the motion sensor to not function at all, and instead use the light in a conventional manner.
Also, a photocell is integrated into motion sensor lights and is used to prevent the sensor from turning on the light during the day. Some motion sensor lights can also utilize the photocell to enable the light to be set so that it is always on from dusk till dawn.
Finally, note that a motion sensor’s sensitivity level and field of view will change over time. This is typically caused by age, dirt on the sensor window, and objects such as bushes and trees that may grow into their viewing angle. To maximize the life of the motion sensor light always keep the sensor window clean, and the shrubs and trees trimmed.
For help on building a new custom home, see HomeAdditionPlus.com’s New Home Construction Bid Sheet. The New Home Construction Bid Sheet provides you with the knowledge on how to plan a custom home building project, and what to look for when hiring contractors for your new home construction. It also includes a detailed cost breakdown table and spreadsheet for estimating your own new home construction building costs.

Related Information on Adjusting Sensor Lights
- Motion Activated Exterior Lights
- How to Replace an Exterior Light Fixture Video
- Motion Activated Exterior Lighting
Additional Electrical Wiring Resources from Amazon.com
 |
 |
Free Home Addition Price Quotes with No Obligation!
Fill out our 3-5 minute quick and easy form, and receive a free price quote on a house addition from one of our prescreened and licensed home addition contractors. This process is free and there is no obligation to continue once you receive your house addition price estimate.