Step by Step Instructions for Eliminating Drywall Nail Pops
By Mark J. Donovan
|
|
Drywall nail pops are quite common. Drywall nail pops occur for a variety of reasons, including heavy vibrations, varying humidity levels that cause the drywall stud to expand and contract, and strong wind action that can rack the house frame structure.
However the root cause of drywall nail pops is the loss of friction between the drywall nail and the wall stud. Due to the various vibration and humidity levels drywall nails can lose their friction with the drywall stud and work their way out from the wall stud. |
Fortunately patching drywall nail pops is an easy do it yourself project.
To patch drywall nail pops you will need the following tools and materials:
- Hammer
- Screw Gun
- 4” Drywall Taping Knife
- Joint Compound
- Sandpaper
- 2 Drywall Screws
- Latex Paint Primer
- Paint
- Paint Brush
Patching Drywall Nail Pops
Start by using your hammer to sink the drywall nail back into the wall stud. Don’t worry about creating a little dimple. Give the nail head one or two serious hammer blows to sink the nail sufficiently into the drywall and wall stud.
| Next use your screw gun and place a drywall screw just above and below the drywall nail. This will help to permanently hold the drywall to the wall stud, as the original drywall nail would otherwise eventually work its way out again if it was re-stressed.
Now using your drywall taping knife and some joint compound cover the drywall nail head and drywall screws. Make sure you work the joint compound flush with the wall, however leave a slight rise of joint compound directly over the drywall nail/screws. |
 |
Let the joint compound fully dry and then apply a second thin coat. On the second coat flare out the joint compound a little beyond the original coat.
Again, let the joint compound fully dry and then sand lightly around the area. When sanding pay particular attention to the edges of the joint compound. You want to make sure the edges blend in fully with the wall surface. Also, make sure you do not sand off too much directly over the drywall nail and screws.
Finally, apply a latex primer over the sanded joint compound area and then paint.
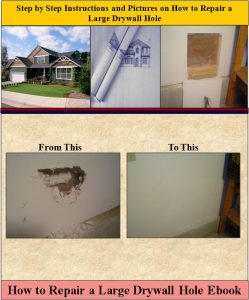
For information on repairing a large drywall hole, see the “How to Repair a Large Drywall Hole” Ebook from HomeAdditionPlus.com. The “How to Repair a Large Drywall Hole” Ebook provides step-by-step instructions on how to repair your damaged wall so that it looks as good as new.
See HomeAdditionPlus.com’s Drywall Calculator
Related Information
- Detailed Drywall Installation Instructions
- How to Repair a Drywall Tape Seam
- How to Install Wall Anchors
Additional Drywall Installation Resources from Amazon.com
 |
 |
Free Home Addition Price Quotes with No Obligation!
Fill out our 3-5 minute quick and easy form, and receive a free price quote on a house addition from one of our prescreened and licensed home addition contractors. This process is free and there is no obligation to continue once you receive your house addition price estimate.