How to Finish Drywall to Hide Seams and Nail Holes
By Mark J. Donovan
|
|
When it comes to installing drywall, hanging drywall is the brawn part, and drywall finishing is the finesse part. This said finishing drywall can be done by the do it yourself homeowner with the right tools and material. To finish drywall you’ll need 6”, 8” and 10” drywall taping knifes, a pole sander and sand screen, drywall paper tape, and all purpose ready mix joint compound. Also have a shopvac close by, and make sure to wear a mask and eye protection when sanding.
Filling Nail Spots and Bedding Drywall Tape into Seams Start by using your 6” drywall taping knife to cover nail holes. Then go back and begin to tackle the seams. Again use your 6” drywall taping knife to apply a bed of joint compound into the seams. |
After applying the joint compound to a seam, cut a length of drywall paper tape and place it over the wet seam. Use your 6” taping knife to bed the tape into the seam, however don’t press so hard that you remove the joint compound from behind the drywall tape.
Once you have bedded the tape into the joint compound apply a coat of joint compound (mud) over the drywall tape. Repeat this process for all of the seams, including the corners. For the exterior corners you will need to attach corner bead first if it has not already been installed.
| With the first phase of the drywall finishing process complete and fully dry, you can move onto the next stage.
Second Drywall Finishing Mud Coat Use your 6” drywall taping knife and quickly run it over the edges of all the seams and nail holes to remove any high ridges on the dried joint compound. Next, use your 8” drywall taping knife to apply a second coat of joint compound over the nail spots and seams. Feather out the seams another 2 inches wider on each side of the drywall tape, so that you effectively flare out the seam. Also do the same for the nail spots. |
 |
Final Drywall Finishing Mud Coat
After the second coat of joint compound has dried, use your pole sander and sand screen to lightly sand the edges of all the seams so that they blend in with the surrounding walls and ceilings. Then lightly sand directly over the taped areas and nail spots to remove any high ridges.
| Use your 10” drywall taping knife and apply a final skim coat of mud over the drywall seams and nail spots. Again, feather out the seams another 2 inches wider on each side of the seams. Likewise feather out the nail spots another couple of inches in diameter. When feathering out the seams take long strokes directly over and parallel to the seams.
After the final coat of mud has dried, use your pole sander and sand screen again to lightly sand over the seams and nail spot edges to blend the joint compound into the walls and ceiling. Also very lightly sand over the center of the seams and nail spots. |
 |
Finally prime the walls and ceiling to complete the drywall finishing process.
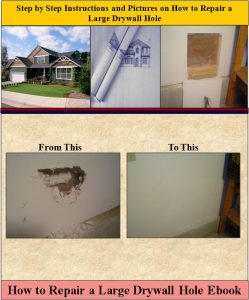
For information on repairing a large drywall hole, see the “How to Repair a Large Drywall Hole” Ebook from HomeAdditionPlus.com. The “How to Repair a Large Drywall Hole” Ebook provides step-by-step instructions on how to repair your damaged wall so that it looks as good as new.
See HomeAdditionPlus.com’s Drywall Calculator
Related Information
- How to Cut Circular Drywall Holes Using a Compass Guide Video
- How to Tape and Mud Drywall Video
- How to Properly Sand Drywall
Additional Drywall Installation Resources from Amazon.com
 |
 |
Free Home Addition Price Quotes with No Obligation!
Fill out our 3-5 minute quick and easy form, and receive a free price quote on a house addition from one of our prescreened and licensed home addition contractors. This process is free and there is no obligation to continue once you receive your house addition price estimate.