Installing Exterior Trim Needs to be Done Right to Prevent Water Damage to the Home
By Mark J. Donovan
|
|
Installing exterior trim around a sliding door is fairly easy to do however it’s important to do it in a certain sequence. In addition, there are a few key tasks that must be done to prevent water from penetrating behind it. If water gets behind the exterior trim the sliding door and adjacent walls may begin to experience rot, mold and mildew, and insect infestation.
After measuring the amount of trim that you’ll need for the job, preferably buy trim lumber that is sealed on all sides if you plan to use wood lumber. |
Also, after each cut that you make on the lumber apply a sealer or primer to the exposed wood ends.
Alternatively you can use an all vinyl type exterior trim product such as Azek trim, however it’s quite pricey. You can also consider fiber cement siding.
In addition, make sure to buy ice and water shield, Z-strip flashing and paintable exterior caulk. The ice and water shield should be applied around the perimeter of the door frame to create a seal between the sliding door nailing flanges and wall sheathing. The Z-strip flashing is meant to go over the upper edge of the top piece of exterior trim to prevent water from seeping in behind the trim piece. The caulk is used between the edges of the exterior trim pieces and the house siding. See how to caulk around doors and windows here.
| As I’ve already mentioned there is a specific sequence to installing exterior trim around a sliding door. Always work from the bottom up when installing the door or window trim. This includes the installation of the ice and water shield. First apply a strip of ice and water shield to the bottom nailing flange and wall sheathing.
Then install ice and water shield strips along the sides, making sure the side pieces overlap the bottom piece. |
 |
Finally, attach a strip of ice and water shield across the top of the sliding door nailing flange and wall sheathing. Again, make sure the top strip of ice and water shield overlaps the side pieces to create a shingle like type water seal.
Next install the bottom exterior trim piece to the house siding. The width of the exterior trim can vary depending upon your particular preference and situation, however it typically is around 2 to 4 inches in width. The length of the bottom piece should be the same width as the sliding door. Fasten it to the wall sheathing using galvanized finished nails. Also, apply a bead of caulk to the back bottom edge of it before nailing so that a water tight seal is created with the house siding that abuts up to it.
| Next install the side pieces of exterior trim around the sliding door. Normally it is best to keep a consistent trim width all around the sliding door frame. So for example, if you went with a 2-1/2 inch width on the bottom trim piece use the same width on the side and top pieces.
The side trim pieces should be cut to a length so that their top ends are flush with the top of the sliding door frame and their bottom edges are flush with the lower edge of the bottom trim piece. Again, apply a bead of caulk to the back outside edges that abut up against the house siding to form a water tight seal between the two edges. |
 |
Finally, fasten the trim pieces to the wall sheathing with 2 inch long galvanized finished nails. Nail every 12 inches or so along the trim piece lengths.
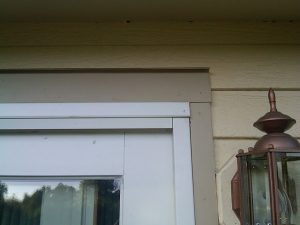
For the top exterior trim piece first slide a piece of Z-strip flashing underneath the bottom edge of the house siding that sits above the sliding door. Again, the gap between the house siding and the top of the sliding door frame should be approximately the same width as the width of the bottom and side trim pieces.
Then cut a piece of exterior trim to length so that it fits over the top of the sliding door and its ends are flush with the outer edges of the side trim pieces. Slide into place so that the Z-flashing slips over the top edge of the trim piece. First, however, make sure to apply a bead of caulk to the side ends of the piece. Again, fasten in place with 2 inch long galvanized finished nails.
Finally apply one final bead of caulk around the exterior trim and house siding, fill any nail holes, and touch up paint the exterior trim surface to complete the project.
For information on how to install interior door trim, see the “Installing Interior Door Trim” eBook from HomeAdditionPlus.com. The “Installing Interior Door Trim” eBook provides step-by-step instructions on how to install interior door trim. Pictures are included for every key step in the process.
Related Information
- How to Replace an Exterior Door Handle
- How to Replace a Front Entry Door
- How to Remove a Sliding Glass Door Panel
Additional Door Resources from Amazon.com
 |
 |
Free Home Addition Price Quotes with No Obligation!
Fill out our 3-5 minute quick and easy form, and receive a free price quote on a house addition from one of our prescreened and licensed home addition contractors. This process is free and there is no obligation to continue once you receive your house addition price estimate.