Step-by-Step Instructions on Framing an Arched Doorway
By Mark J. Donovan
|
|
One way to add some character between two rooms in your home is to build an archway doorway. Though it may sound complicated at first blush, building an arched doorway is actually fairly easy to do. The only real difficulty is getting the right shaped arched, but there are a few tips that can help in doing this. Read on to find out how.
To begin the process of building an arched doorway, remove any existing entranceway trim between the two rooms and the drywall that is covering the wall studs of the existing doorway opening. |
Next, find a large sheet of cardboard that can span the doorway opening and have the desired archway depth. Attach the cardboard to the doorway opening using tape or tacks. Then, using string and two attached pencils, trace the desired doorway arch on the cardboard. You can do this by placing one pencil centered at the bottom of the cardboard and pushed into it, and sweeping the other end of the string with the other pencil attached to it over the piece of cardboard.
| The length of the string should be such that at full extension it reaches the top of the doorway opening. Also, make sure to trace around the perimeter of the cardboard along the doorway edges to get the non-arched shape of the doorway.
As an alternative to using the string method, you can simply free hand the arch shape using just a pencil, if for example you want to simply make some gentle curves near the corners of the doorway. Once you feel you’ve got the desired archway use the cardboard template to cut two archways out of ½” thick plywood. |
 |
Next, rip a couple of 8 foot 2x4s to remove 1 inch from their width, so that they are 2-1/2 inches thick. Fasten the necessary lengths of ripped 2x4s to the top and upper sides of the doorway to act as nailing surfaces for the plywood arches that you just cut out. Use 2-1/2 inch screws instead of nails for securing the 2x4s to the existing doorway wall studs so that you prevent cracking any surrounding drywall surfaces.
After securing the top and two side 2x4s archway wall studs, attach two additional diagonal 2x4s between the center of the top 2×4 and the bottom of each side of the vertical 2×4 pieces.
| Next, attach the plywood arches to the newly attached wall studs using 1-5/8 inch screws.
Then, using a few ripped 2×4 scraps fill in some of the opening spaces between the two plywood arches to add rigidity and nailing surfaces for the drywall. Finally drywall over the plywood arched doorway opening. If the 2x4s were ripped to the right thickness the drywall should sit flush with the adjacent drywall surfaces. If the arch does not have too tight of a radius simply bend into shape a drywall strip of the required width along the bottom edge of the arched doorway, and fasten it to the framed archway with 1-5/8 inch drywall screws. |
 |
If the radius is too tight you may need to install a few sections of drywall to cover the bottom edge of the arched doorway.
Finally attach flexible corner bead to the bottom edge of the arched doorway and then tape and mud the corner bead and other drywall seams. To wrap up building the arched doorway project, prime and apply a couple of coats of paint.
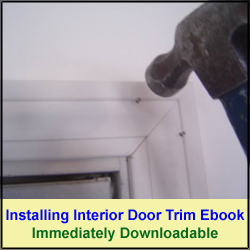
For information on how to install interior door trim, see the “Installing Interior Door Trim” eBook from HomeAdditionPlus.com. The “Installing Interior Door Trim” eBook provides step-by-step instructions on how to install interior door trim. Pictures are included for every key step in the process.
Related Information
Additional Door Resources from Amazon.com
 |
 |
Free Home Addition Price Quotes with No Obligation!
Fill out our 3-5 minute quick and easy form, and receive a free price quote on a house addition from one of our prescreened and licensed home addition contractors. This process is free and there is no obligation to continue once you receive your house addition price estimate.