How to Replace the Bottom Section of a Rotted Door Frame
By Mark J. Donovan
|
|
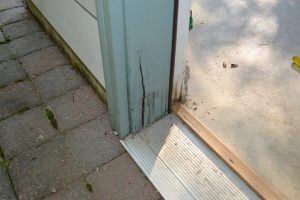
Roof water runoff can damage any part of a home including an exterior door frame. The bottom of door frames can frequently become checked and rotted due to water running off the roof and then splashing up on the lower portion of the door.
When this situation occurs, homeowners often make a rash decision to replace the door outright. Replacing an entire door and door frame, however, is expensive and often not necessary. See how much here. |
With half a day’s effort and a few key tools I was able to do my own door rot frame replacement and save quite a bit of money.
Find a local door installation contractor here.
To do my own door rot frame replacement I used a table saw, circular saw, hammer, pliers, level, prybar, duct tape, caulking gun and putty knife. For materials I used ¾ and ½ inch plywood, a piece of 2×4, silicone caulk, and paint.
Removing Bottom of Rotted Door Frame
I first removed the interior trim along the door frame edge that I planned to replace. I used a putty knife, pry bar, and hammer to remove the trim. I then pulled back the door seal and taped it out of the way.
Next, I cut a 10 inch piece of lumber approximately 1 inch wide and ¾” thick. I then used my level to create a straight line on the door frame, approximately 2 inches above the rotted out section of door frame. I attached the piece of lumber to the door frame using a couple of finished nails. This piece of lumber acted as a guide for my circular saw. I did not nail the finished nails flush as I wanted to remove the board after cutting away the rotted door frame.
 |
 |
I then set the circular saw blade to the depth of the door frame and cut out the section of rotted door frame. I held the saw perfectly steady and on the mark when I made this very important cut.
Next I pulled out the rotted section of wood, swept the area clean and applied a heavy bead of silicone caulk underneath the metal doorframe threshold.
| Replacing Bottom of Rotted Door Frame
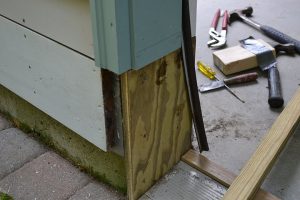
After removing the section of rotted door frame with my circular saw I began the task of actually rebuilding the door frame. I decided for best results when doing door rot frame replacement I’d use pressure treated ¾ and ½ inch plywood. |
 |
I used my table saw to cut a properly sized piece of ¾ inch plywood to fit in the area where I removed the section of rotted door frame. I then fasten it to the door frame stud using galvanized nails.
Next, I used the table saw to cut a properly sized piece of ½ inch plywood to fit over the ¾ inch plywood piece. I also cut out a 1/8 inch thick strip along the back side of this piece so that I could slide the door seal lip into it. Again I attached it to the ¾ inch plywood and door frame using galvanized nails.
For the exterior trim brick moulding I fashioned it out of a piece of 2×4 lumber. I first cut the rough dimensions of the fabricated brick moulding out of the 2×4 using my table saw.
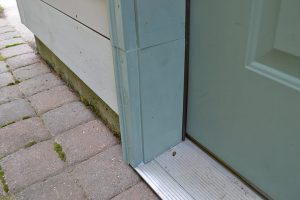
| I then added the trim detail reveal lines to the exterior edge of my homemade brick moulding by again using my table saw. Next I painted this piece of lumber on all sides and allowed it to fully dry.
Once the brick moulding piece was dry, I attached it to the exterior of the door frame using galvanized nails. Next, I reattached the door seal and interior door trim. |
Watch this video on how to install a bottom door seal. |
Finally, I caulked all the seams with a paintable exterior grade caulk, allowed it to fully dry, and then touched up painted the bottom door frame.
| With that, my door rot frame replacement project was done. It took the better part of a morning, and I was able to do it for free as I used old scraps of wood material that I had stored in my garage.
Don’t forget one last thing! To ensure your home is free from cold air drafts during the winter watch this short video to see how to easily install door and window weatherstripping. |
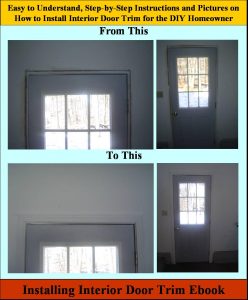
For information on how to install interior door trim, see the “Installing Interior Door Trim” eBook from HomeAdditionPlus.com. The “Installing Interior Door Trim” eBook provides step-by-step instructions on how to install interior door trim. Pictures are included for every key step in the process.
Related Information
- How to Install a Bottom Door Seal Video
- How to Install a Screen Door
- How to Install an Exterior Door
- How to Maintain a Storm Door
Additional Door Resources from Amazon.com
 |
 |
Free Home Addition Price Quotes with No Obligation!
Fill out our 3-5 minute quick and easy form, and receive a free price quote on a house addition from one of our prescreened and licensed home addition contractors. This process is free and there is no obligation to continue once you receive your house addition price estimate.