How to Build a Brick or Paver Walkway using Brick Pavers
By Mark J. Donovan
|
|
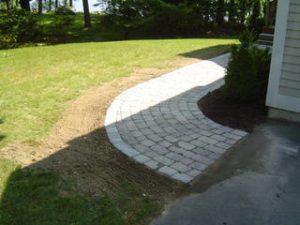
The use of bricks or pavers to create a formal walkway to the entrance of your home can add real character to it. In addition, brick and pavers are made from natural building materials that last forever. Admittedly, the bricks or pavers may need to be reset every decade or so due to insect and weather related erosion to the walkway’s base, but the bricks/pavers can be reused. Another nice benefit of installing a brick or paver walkway is that it doesn’t necessarily require a professional.
With a sketch for a walkway plan, some upfront knowledge on installing brick/paver walkways, and a few basic tools the average homeowner can tackle this type of project over a weekend or two. |
The important step in installing a brick paver walkway is properly preparing the soil base before setting the brick pavers. If the soil base is not prepared properly the bricks will end up not being able to be set evenly, the soil base will erode in short order, and the quickly eroding soil base will just exacerbate the unevenness of the walkway until it looks like a small disaster.
| Preparing the Walkway’s Soil Base
To prepare an area for a walkway start out by staking and stringing the exact location for the walkway. Then remove the first one to two feet of soil from the area inside the string lines. It is important to remove all the topsoil. Also, if there is clay, you want to remove at least 12 inches of it to prevent the walkway from swelling and settling due to the clay soil absorbing moisture after every rain storm. The constant swelling and settling of the clay, and the brick/paver walkway above it, will cause the finished walkway to become uneven in very short order. After digging out the area for the walkway, dump ¾ inch gravel stone into the area to within a couple of inches of the final height for the brick walkway. Then tamp it down either with a rented tamper or with some other heavy object. The tamping helps to lock the gravel stone into place and prevent it from settling any further after installing the brick walkway. |
 |
Next, apply approximately a 2 inch layer of sand or stone dust over the tamped down gravel. Again, the sand or stone dust should be tamped down to create a smooth and even surface. Also, the tamped down sand or stone dust should be at a height below the string line equal to the thickness of the brick pavers to be installed. Thus, when the brick pavers are set into the sand / stone dust base the top surface of them should be equal to the string line height.
With the soil base now properly installed place 1 inch in diameter pipe, or the equivalent size ledger board, on either side of the walkway.
The pipe or ledger board do not need to be the length of the walkway. Instead, they should be between 4 to 8 feet in length. These pipes / ledger boards will act as rails, if you will.
| Now, using the flat edge of a 2×4 that spans the width of the walkway soil base slide it over the soil base and along the pipe / ledger board rails. You’ll observe that you’ll get a very smooth and even surface on the soil base for setting the brick pavers. Move the rails, and repeat this process over the entire length of the walkway area. Again, when the brick pavers are set into the sand / stone dust base the top surface of them should be equal to the string line height. So keep this in mind when smoothing out the soil base.
Next, carefully lay on the smoothed out soil base plastic brick borders. You can purchase these at any home improvement center. |
 |
The plastic brick borders will act as the walkway’s finished edges and will help to maintain the structural integrity of the walkway. The plastic brick borders should be fastened into the soil using 12 inch spikes. However, be careful not to disturb the finished surface of the walkway soil base. A spike should be placed into the border every 12 to 16 inches.
Setting Brick Pavers
With the soil base prepared and the borders anchored down you can now start setting the brick pavers. Hopefully you’ve already figured out a setting pattern for the brick pavers. The key reason for using one of the common patterns for laying bricks is to ensure that the bricks interlock with one another. This helps to maintain the structural integrity of the walkway.
While setting the bricks / concrete pavers, you’ll inevitably have to end up cutting some of them to fit. You can either rent a wet saw designed to cut bricks or concrete pavers or you can use a brick splitter. I prefer the wet saw as you can ensure nice and accurate clean cuts every time, however, they can be a bit expensive to rent. The brick splitter is cheap, however, it takes experience getting use to splitting the bricks. To be honest, between the cost of the brick splitter and the wasting of many bricks, it adds up to about as much as renting a wet saw for the day. Also, if your walkway is curved you’ll have all but no choice than to rent a wet saw.
Once you’ve set all the bricks or concrete pavers, shore up the outside edges of the walkway with additional sand. Then apply topsoil over the sand and pack it down firmly into place.
Next, spread a layer of sand or stone dust over the freshly set bricks and sweep them into the bricks or pavers with a broom. Repeat this step a couple of times as this process helps to lock the brick pavers into place with each other and will mitigate weed growth in-between the cracks.
Lastly, remove the stakes and strings and spread grass seed over the freshly topsoiled areas to complete the project.
Dress Up Your Home’s Exterior with an Arbor – If you’ve always wondered what to do about a side door entrance to your house or garage to make it more appealing, or just wanted to simply spice up the backyard, building an arbor may be your answer. The “How to Build an Arbor Ebook” provides detailed, step-by-step instructions and pictures on how to build an entrance-way arbor for your home. Order and Immediately Download today!. 100% Money-Back Guarantee if you are not satisfied.
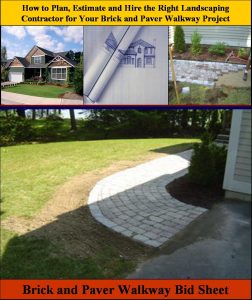
Planning to have a Brick or Paver Walkway Installed by a Landscaping Contractor but not sure what questions to ask to ensure you hire the right one? See HomeAdditionPlus.com’s Brick and Paver Walkway Bid Sheet. The Brick and Paver Walkway Bid Sheet will help ensure that your walkway project goes smoothly and you get the finished walkway you are looking for.
- How to Build a Stone Wall out of Granite Stones
- How to Build a Segmental Retaining Wall
- Paver Stone Walkway Accent Pieces Video
Additional Landscaping Resources from Amazon.com
 |
 |
Free Home Addition Price Quotes with No Obligation!
Fill out our 3-5 minute quick and easy form, and receive a free price quote on a house addition from one of our prescreened and licensed home addition contractors. This process is free and there is no obligation to continue once you receive your house addition price estimate.