Minimum Thickness for Concrete Shower Pans
By Mark J. Donovan
|
|
When building a shower pan it is critical that it be designed so that the water drains towards the adjustable drain assembly in the center of the shower area. It is also essential that the mud shower pan thickness be substantial enough so that it doesn’t crack or have little to no structural strength. Thus it is extremely important to build a shower pan that that has a pre-slope that will funnel water towards the drain and be of minimum thickness for the concrete shower pan to provide structural rigidity. |
How to Determine the Proper Mud Shower Pan Thickness
Calculate a measurement of how high the mortar needs to rise up along the outer shower walls to create the proper drain slope.
For proper drainage, use ¼ inch in height for every 12 inches of run travel from the shower drain center.
|
Also keep in mind that the mortar thickness in the pre-slope should be ½” to 1” thick. For example, if the shower pan pre-slope layer thickness is to be ½” thick, and if the run distant from the drain center to the shower wall is 2 feet, the height of the pre-slope mortar bed on the shower walls should be one inch thick. Using a 2 or 4 foot level, mark a line on the felt paper at the appropriate height, based upon your calculations. |
 |
Continue to draw this line all around the walls of the shower stall, as this reference line will represent the finished height of the pre-slope mortar.
After the reference line has been drawn, you now know how thick the pre-slope will be relative to the shower walls. Also, you’ll have allowed for the pre-slope mortar layer to achieve a mud shower pan thickness of at least 1/2 inch thick.
|
|
Thickness for Concrete Shower Pan – Base Layer
Once you’ve installed the pre-slope mortar and the shower pan membrane liner you can pour the base mortar layer over the shower liner, but don’t do this until you first install the adjustable drain assembly into the shower drain and adjust the height of it by simply rotating clockwise or counterclockwise. The shower pan base mortar layer thickness should be approximately ½ to 1 inch thick. Since the shower floor already has a pre-slope, just apply a base mortar layer that has an even thickness throughout the shower floor area. |
Again, use a level to mark the finished height along the shower walls to help as a guide when troweling the mortar evenly throughout the shower floor area. You might also want to use your spirit level during this process to ensure an even application of the mortar to the base layer.
After troweling out the base mortar layer to the appropriate mud shower pan thickness, let the mortar set up for 24-48 hours before installing ceramic tile.
One last tip: While the base mortar is curing, occasionally rotate the shower drain assembly to ensure that it can be adjusted later for the finished ceramic tile height.
For information on installing a shower pan membrane liner for a ceramic tile shower, see the Shower Pan Membrane Liner Installation Ebook from HomeAdditionPlus.com. The Shower Pan Membrane Liner EBook will quickly teach you the step-by-step process for installing the shower pan membrane liner correctly. It includes instructions on framing the shower stall, pouring the pre-slope and shower base mortar, and installing the shower pan membrane liner.

See HomeAdditionPlus.com’s Ceramic Tile Calculator
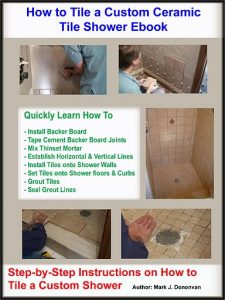
See my “How to Tile a Custom Ceramic Tile Shower” Ebook to learn how to tile your own shower: For a detailed set of instructions on tiling a shower floor and walls, including pictures for every step in the process, see my “How to Tile Custom Ceramic Tile Shower Ebook”.
Related Information
Additional Ceramic Tile Resources from Amazon.com
 |
 |
 |
Get Free Bathroom Remodeling Price Quotes with No Obligation!
Fill out our 3-5 minute quick and easy form, and receive a free price quote on a bathroom remodeling project from one of our pre-screened and licensed bathroom remodeling contractors. This process is free and there is no obligation to continue once you receive your bathroom addition price estimate.