Learn How to Install Ceramic Floor Tile like the Pros
By Mark J. Donovan
|
|
Ceramic tile is unbeatable in terms of its natural beauty, durability and ease of installation. Admittedly ceramic floor tile may cost more than vinyl or linoleum to install, but neither holds a candle to the durability of ceramic tile. Ceramic floor tile is an ideal flooring product for many rooms within a home as it is low maintenance, water resistant, and simply beautiful to look at. It is commonly used in bathrooms, kitchens, laundry rooms, finished basements, hallways and entrance ways. It is also used outdoors on patios and around pools.
I have personally installed ceramic tile on floors in bathrooms, hallways, entranceways and in basements, and in all cases my tiling jobs have stood the test of time. I’ve also installed ceramic tile in showers and for kitchen backsplashes. |
In the ensuing paragraphs of this article I explain the various steps involved in installing ceramic tile. Suffice it to say, with a tile cutting wetsaw, notched trowel, a rubber float and sponge, and a couple of buckets, any moderately skilled DIY homeowner can install ceramic tile, with a bit of upfront knowledge.
Types of Ceramic Tiles
The first consideration when installing ceramic tile is selecting the right type of tile for the project. Ceramic tile comes in two types, Porcelain and Glazed. Glazed ceramic tiles are best for heavy foot traffic areas and porcelain tiles work best on walls, such as in bathrooms. Consequently, glazed tiles are the preferred choice when tiling a floor.
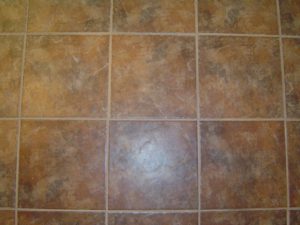
Ceramic tiles also come in a plethora of colors, patterns and sizes. However, for tiling a floor I recommend the use of larger tiles, such as 12”x12” tiles or bigger.
| Subfloor Preparation
The key to ceramic tile flooring holding up for the test of time is the proper installation of a subfloor, or underlayment. A solid subfloor prepared for ceramic floor tile will have virtually no type of deflection in it. If there is, the deflection will cause the tiles to eventually loosen and potentially crack. Typically a subfloor base is constructed out of ¾ inch tongue and groove plywood. When tiling a floor, an additional ¼ inch or ½ inch of CDX grade exterior plywood should be installed over it. The base ¾ subfloor should be screwed and glued well to the floor joists, and the additional layer of plywood should be screwed solidly to the base subfloor. |
 |
This additional layer of plywood should be screwed every 6 to 8 inches across the entire field of each sheet. In addition, the edges of each sheet of this additional layer of plywood should be screwed down along its periphery. Also, make sure that screws are placed over floor joists as well.
If the tiles are to be installed on a concrete slab then no additional subfloor material is required as the concrete base has no deflection.
Prepping the Area for Tile
To ensure a quality ceramic floor tile installation, draw a pair of orthogonal reference lines that intersect in the center of the room to be tiled. Then temporarily place tiles along the orthogonal lines to see how much tile cutting may be required at the far ends of the lines, near the walls. You may need to adjust the location of the tiles so that the far end tiles are cut equally. Note that you never want to place floor tiles such that cut stubby tiles show up in the center of the tile field. Also, adjust the placement of tiles such that the wall most visible from all others has the least stubby cut tiles.
Once you’ve finalized and made additional marks on the subfloor for where you want to place your tiles permanently, remove the tiles and get ready for the real installation.
| Installing Ceramic Tile
Now the fun part begins. First make sure the subfloor is completely free of any debris, as well as from lumps and bumps. Use a broom or vacuum for this. Next, mix up thinset mortar per the instructions on the package and allow it a couple of minutes to slake up (stiffen up a bit). Then use a notched trowel to spread a layer of thinset mortar onto the subfloor, preferably near the intersection of the orthogonal marks or even more preferably near the additional marks where you want the tiles to actually be placed. |
 |
Only apply the thinset mortar to about a 10 square foot area. This is a workable size area for placing tile and for taking the time for cutting any tiles. If you cover too much of an area with thinset mortar, a portion of the area may actually begin to setup before you get an opportunity to place the ceramic tiles in it. Also, only make up enough thinset mortar for about 30 to 45 minutes of use. You can keep mixing up additional batches of it as you progress with placing the tiles.
When applying the thinset mortar use the flat edge of the trowel to first quickly spread it across the area. Then go back over it with the notched edge of the trowel to create the grooves in the thinset. It is these grooves that help to securely fasten the ceramic tile to the subfloor.
| Make sure not to skimp when applying the thinset mortar to the subfloor. The thinset mortar should be applied such that there is between 1/8 inch and 3/16 inch on the subfloor.
Also note that the bigger the ceramic floor tiles installed, the larger the notch should be in the trowel. For example, with 12”x12” ceramic tiles you should use a trowel with ¼ inch notches. To ensure the tiles are placed uniformly you may want to use tile spacers or lugs. You can buy them in various dimensions to achieve specific grout line thicknesses. In regards to cutting ceramic tiles, I highly recommend buying or renting a tile cutting wetsaw. It speeds up the project immensely and prevents wasting tiles. You may also want to buy some tile nippers for very small cuts. |
 |
Grouting Ceramic Floor Tiles
After installing the ceramic tiles allow them to set up for 24 to 48 hours. If installing them in a high humidity area, such as in a basement, I’d give it 48 hours.
Once the ceramic tile floor has fully cured, you can then grout the tile. Like ceramic tile, grout comes in many different colors. Pick one that complements, and maybe even contrasts, with the ceramic tile.
| Grouting is easy to do, but it is tedious and messy, so be prepared. You’ll need a couple of large buckets of clean cool water, a bucket of mixed grout, and a rubber float and large sponge.
After mixing up the grout per the package directions apply it to the field of ceramic tile using the rubber float. Make sure to push and work the grout well into all the joints and seams. To do so, hold the rubber float at a 45 degree angle when applying the grout to the ceramic tile floor. Also, at joints (4 corner intersections) run the rubber float at 45 degree angles to the joints. After you’ve grouted a 5 to 10 square foot area, use a clean wet sponge to wipe away the excess grout from each tile. |
|
You don’t need to get each tile spotless during this pass with the sponge. You simply want to remove the gross levels of excess grout from the tile. Continue with this process until you’ve grouted the entire ceramic tile floor.
Then go back and wipe down each tile with a clean sponge. This time taking a bit more care to clean each tile nicely.
Allow the grout to set up for about another 30 minutes and repeat cleaning the tiles with the sponge and clean water.
One hour later repeat the cleaning process again with the sponge and clean water.
Finally, a couple hours later go back and wipe each tile down with cheese cloth to ensure a polish cleaned finish.
Let the grout set up over night and the next day your newly installed ceramic tile floor is ready for use.
For information on installing a shower pan membrane liner for a ceramic tile shower, see the Shower Pan Membrane Liner Installation Ebook from HomeAdditionPlus.com. The Shower Pan Membrane Liner EBook will quickly teach you the step-by-step process for installing the shower pan membrane liner correctly. It includes instructions on framing the shower stall, pouring the pre-slope and shower base mortar, and installing the shower pan membrane liner.
See HomeAdditionPlus.com’s Ceramic Tile Calculator
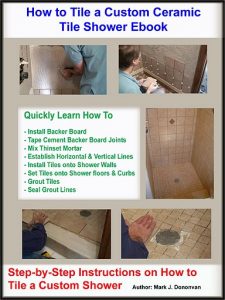
See my “How to Tile a Custom Ceramic Tile Shower” Ebook to learn how to tile your own shower: For a detailed set of instructions on tiling a shower floor and walls, including pictures for every step in the process, see my “How to Tile Custom Ceramic Tile Shower Ebook”.
Related Information
Additional Ceramic Tile Resources from Amazon.com
 |
 |
 |
Get Free Basement Remodeling Price Quotes with No Obligation!
Fill out our 3-5 minute quick and easy form, and receive a free price quote on basement remodeling from one of our prescreened and licensed basement remodeling contractors. This process is free and there is no obligation to continue once you receive your basement remodeling price estimate.