Tips for Achieving a Professional Ceramic Tiled Shower
By Mark J. Donovan
|
|
Tiling a shower is a great way to add beauty and charm to your bathroom. Even a light-weight do it yourselfer can install ceramic wall tile. To tile shower walls all you need is some basic upfront tile installation knowledge and a few inexpensive tools.
Shower Wall Preparation When tiling shower walls it is imperative that a backer board be first installed over the wall studs. |
I highly recommend removing the existing drywall or green-board, and installing a cement backer board, such as DUROCK. Make sure you install the rough side outwards, so that it faces the tile.
There are newer alternatives to cement backer board, such as Hardie backer board, however I am still a little bit old school and wary when it comes to tiling shower walls.
Cement backer board is made out of cement, and consequently will not breakdown when exposed to water. Other backer board products, however, have a fiberglass surface and a Gypsum core. If the fiberglass surface is cracked and water penetrates into the Gypsum core, the backer board will break down.
Cement backer board should be fastened to wall studs with corrosion resistant screws on 6 to 8 inch centers.
An alkaline resistant fiberglass tape should then be applied over the seams and imbedded into a skim coat layer of thinset mortar.
When tiling shower walls it is important to use a thinset mortar. Mastic and other tile adhesives should not be used in wet areas such as a shower.
| Tiling Shower Walls – Drawing Reference Lines
When it comes to tiling shower walls it is best to start on the back wall. To start the process of installing shower wall tiles, find the horizontal and vertical centers of the back wall. Mark these points with a pencil and then use a level to create pencil marks along the entire width and height of the shower wall. Vertical Line Adjustment Next measure the width of the back wall and divide it by the width of a tile. This will determine the number of tiles you will need across the back wall. |
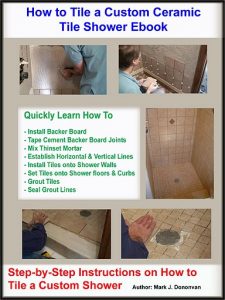 Learn how to tile a shower with this eBook. |
Now transfer the wall width measurement and horizontal center line point onto a nearby floor. Use a couple pieces of masking tape to identify the end points and center point on the floor.
Next lay the calculated number of tiles out on the floor between the endpoints, starting from the center point and working your way outwards.
After laying out the tiles, confirm that the end tiles are of even width. If they are not, adjust the location of the horizontal center line so that they are. Transfer this difference between the measured centerline and the adjusted centerline to the actual shower wall.
Now draw your new vertical line using your level and pencil. You will use this line for installing your first shower wall tiles.
Repeat this process on the other shower walls.
| Horizontal Line Adjustment
In regards to finding the appropriate vertical height, measure the distance between the horizontal line and the base of the shower. Divide this distance by the length of a tile. If the result is a whole number the existing horizontal line will be your other reference location for starting wall tiles. If the result is not a whole number shift the horizontal line either up or down so that it is, and draw a new horizontal line. Run this horizontal line along the other shower walls using your level as a guide. |
 |
Once you have marked your final set of vertical and horizontal lines snap additional lines using a chalk line every 6 to 12 inches in both the vertical and horizontal direction. These lines will act as reference lines as you install the shower wall tiles.
Finally, tack a piece of 1”x3” ledger board on the horizontal lines using screws. Your first row of tiles will sit on this line.
Actually Tiling Shower Walls – Upper Half
Again use a thinset mortar for installing the shower wall tiles. The thinset mortar should be mixed to a paste like consistency.
Use a ¼” notched trowel to trowel the thinset mortar onto the backer board. Only cover about a 2’x2’ area and have it start on either the right or left side of the center vertical line and just above the ledger board.
First use the flat side of the trowel to put on a skim coat of mortar. Then apply a second coat of mortar using the notched side of the trowel. Make nice clean vertical rows when applying the mortar.
Now begin to install ceramic wall tiles onto the shower walls, starting from the center and working your way outwards on each wall. Push each wall tile into the thinset mortar and lightly tap and twist it into place using the palm of your hand.
Install the wall tiles in a stair step pattern alternating between going up and out. Continue this process to complete the upper half of the shower walls.
Install the bull nose wall tiles and cut tiles last. I would suggest either buying or renting a tile cutter for cutting long straight cuts. In addition, you will also need to purchase some tile nippers for small curved cuts.
Make sure when installing shower wall tiles that the mortar does not squeeze up between the tiles. If it does, wipe away the excess mortar from between the cracks.
Allow the upper half shower wall tiles to set up for about 16-24 hours.
Actually Tiling Shower Walls – Lower Half
First remove the ledger board.
Next apply thinset mortar to the lower half of the shower unit in small sections as was done on the upper half.
Install a row of tiles.
Use a small piece of tape between each wall tile and the tile just above it to hold it in place.
Install another row and repeat this process, again applying tape between this row of wall tiles and the ones just above it.
Continue this process until all of the shower wall tiles have been installed.
Again, make sure when installing the tiles that the mortar does not squeeze up between the wall tiles. If it does, wipe away the excess mortar from between the cracks.
Allow the wall tiles to setup over night, and then remove the tape.
You can then begin the process of grouting the shower wall tiles.
For information on installing a shower pan membrane liner for a ceramic tile shower, see the Shower Pan Membrane Liner Installation Ebook from HomeAdditionPlus.com. The Shower Pan Membrane Liner EBook will quickly teach you the step-by-step process for installing the shower pan membrane liner correctly. It includes instructions on framing the shower stall, pouring the pre-slope and shower base mortar, and installing the shower pan membrane liner.
See HomeAdditionPlus.com’s Ceramic Tile Calculator
See my “How to Tile a Custom Ceramic Tile Shower” Ebook to learn how to tile your own shower: For a detailed set of instructions on tiling a shower floor and walls, including pictures for every step in the process, see my “How to Tile Custom Ceramic Tile Shower Ebook”.
Related Information
Additional Ceramic Tile Resources from Amazon.com
 |
 |
 |
Get Free Bathroom Remodeling Price Quotes with No Obligation!
Fill out our 3-5 minute quick and easy form, and receive a free price quote on a bathroom remodeling project from one of our pre-screened and licensed bathroom remodeling contractors. This process is free and there is no obligation to continue once you receive your bathroom addition price estimate.