Step-by-Step Instructions for Removing Ceramic Tiles
By Mark J. Donovan
|
|
When doing any ceramic tile project it’s always a wise idea to buy a few extra tiles and store them in a safe place so that years down the road you can replace any broken tiles if necessary. Removing ceramic tiles can be a chore however, particularly if you’re simply trying to remove and replace a few broken ones. If, on the other hand, you’re removing all of the ceramic tiles associated with a project, the work can go a bit faster since you’re not trying to save anything.
Years ago I decided to re-tile a custom ceramic tile shower. In that particular situation the job of removing ceramic tiles was very straight forward, since I wasn’t interested in saving the tiles. |
I simply used a hammer and a large thick chisel to remove them. Wearing safety glasses and gloves I hammered the chisel underneath the edge of each tile until it popped offer the surface of the cement backerboard. In most cases each tile came off hole. Only in a few cases did they break. I also did not remove any grout prior to removing the tiles.
| If you do not have matching or replacement tiles associated with a tiled surface it may make sense to remove all the tiles and start over with new tile. Again, the work of removing an entire surface area of tiles is easier than removing a few.
In the event you do have replacement or matching tiles and you simply want to remove a single tile or two, then start by removing the grout around the tile(s) that you want to remove. To remove the tile grout from between the tiles of interest, I recommend using a tool such as the Dremel MultiPro Cordless 7700-02 20,000 RPM Two-Speed 7.2V Rotary Tool System w/50 Accessories. The dremel tool will make short work of removing the grout. |
 |
Note that the grout does not hold the tile in place so do concern yourself about the tiles falling off the wall as you remove the grout. A thinset mortar or adhesive on the back of the tile holds the tile in place.
After removing the grout, use a flexible putty knife to worry underneath one corner of the tile you want to remove. As you work the putty knife into the corner, begin to slide it around the edge of the tile working it deeper behind the back of the tile.
| Use your hammer and gently tap the handle end of the putty knife to push the knife further behind the tile. Once the blade is about a third of the way behind the tile begin to gently twist the putty knife handle to lift the tile away. Eventually the tile will pop off. You may need to work the putty knife further around the tile perimeter a bit to help loosen it up sufficiently to have it pop off.
Once you’ve removed the tile(s) make sure to scrape away any residual thinset mortar or adhesive until it is smooth. Then vacuum away any dust so that the surface is completely clean. Finally, apply thinset mortar or adhesive to the back of the replacement tile and insert it in place. When the tile has fully dried in place, you can apply grout and grout sealer to finish the tile repair. |
 |
For information on installing a shower pan membrane liner for a ceramic tile shower, see the Shower Pan Membrane Liner Installation Ebook from HomeAdditionPlus.com. The Shower Pan Membrane Liner EBook will quickly teach you the step-by-step process for installing the shower pan membrane liner correctly. It includes instructions on framing the shower stall, pouring the pre-slope and shower base mortar, and installing the shower pan membrane liner.
See HomeAdditionPlus.com’s Ceramic Tile Calculator
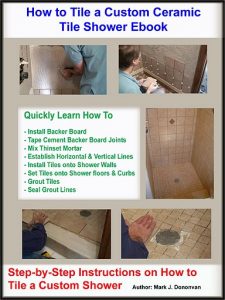
See my “How to Tile a Custom Ceramic Tile Shower” Ebook to learn how to tile your own shower: For a detailed set of instructions on tiling a shower floor and walls, including pictures for every step in the process, see my “How to Tile Custom Ceramic Tile Shower Ebook”.
Related Information
- How to Remove Ceramic Tiles from Shower Walls Video
- Shower Mortar Pan Stackup Video
- How to Tile a Shower Video
Additional Ceramic Tile Resources from Amazon.com
 |
 |
 |
Get Free Bathroom Remodeling Price Quotes with No Obligation!
Fill out our 3-5 minute quick and easy form, and receive a free price quote on a bathroom remodeling project from one of our pre-screened and licensed bathroom remodeling contractors. This process is free and there is no obligation to continue once you receive your bathroom addition price estimate.