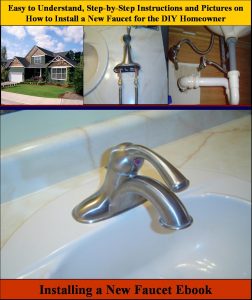
Step by Step Instructions on Replacing a Kitchen Sink Faucet
By Mark J. Donovan
|
|
Our old kitchen sink faucet became so corroded we could no longer swivel it from one kitchen sink bay to the other. So I noted that it was a single hole type kitchen faucet and headed off to the local home improvement center to find a replacement for it. Replacing a kitchen sink faucet is fairly easy to do with the exception that working underneath a kitchen sink is extremely awkward.
However, if you remove all the items from the kitchen cabinet directly underneath the kitchen sink you can usually find enough room in it to work. In regards to the tools required to replace a kitchen sink faucet all you normally need is a crescent wrench and a pair of adjustable channel lock pliers. |
Removing Old Kitchen Sink Faucet
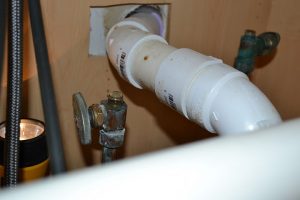
After buying a replacement kitchen sink faucet I returned home and began the task of removing the old kitchen faucet. I started out by first turning off the hot and cold supply lines to the old kitchen faucet. Then using a crescent wrench I disconnected the kitchen faucet’s flexible supply line hoses that were attached to the copper supply line pipes in the kitchen cabinet. I also disconnected the spray hose line from the faucet tube it was connected to.
 |
 |
Next, I loosened the nut that was holding the kitchen faucet fastening plate to the underside of the kitchen countertop with a pair of channel lock pliers. Once the nut was loosened, I used my fingers to remove it from the threaded bolt it was attached to. Finally, I pulled the old kitchen sink faucet up and out of the hole in the kitchen countertop.
| Prepping New Kitchen Sink Faucet for Installation
The next step in replacing my kitchen sink faucet was preparing the new one for installation. It’s better to do this work at a table than underneath the kitchen sink. First, I threaded the spray hose through the main nozzle assembly and then I secured the nozzle itself to the main assembly. I also attached the escutcheon plate and foam gasket to the bottom of the main nozzle assembly to ensure a tight seal with the kitchen countertop. Installing Kitchen Sink Faucet I then slid the replacement kitchen sink faucet assembly into the kitchen countertop hole and crawled back underneath the cabinet. |
 |
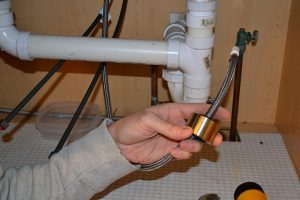
Once back in position underneath the new replacement kitchen sink faucet, I attached a brass washer and large mounting nut assembly to the threaded base of the faucet. I finger tightened it and then attached two locking screws to the mounting nut assembly to securely hold the faucet in place.
| Next I slipped the large spray hose weight over the spray hose and connected the loose end of the spray hose to the spray tube coming down from the base of the kitchen sink faucet.
I then attached the hot and cold supply lines that splayed from the base of the faucet to the hot and cold water copper supply lines. I used a crescent wrench to snug them down tightly to the threaded nipples on the valve assemblies protruding from the top of the copper supply lines. |
 |
Finally, I turned the hot and cold water supply valves back on and tested my newly replaced kitchen sink faucet. As I let the water run I checked for leaks. Fortunately all went well and there were no leaks.
One Final Note
If you decide to replace your own kitchen sink faucet you may find it helpful to remove the kitchen sink drain pipes temporarily to give you a little more room to work. In my case I had sufficient room to work around them so I left them intact.
For information on installing a shower pan membrane liner for a ceramic tile shower, see the Shower Pan Membrane Liner Installation eBook from HomeAdditionPlus.com. The Shower Pan Membrane Liner EBook will quickly teach you the step-by-step process for installing the shower pan membrane liner correctly. It includes instructions on framing the shower stall, pouring the pre-slope and shower base mortar, and installing the shower pan membrane liner.
For information on how to tile a custom ceramic tile shower, see the “How to Tile a Custom Ceramic Tile Shower eBook” from HomeAdditionPlus.com. This eBook will quickly provide you with step-by-step instructions on how to measure and install ceramic tile in a shower, including the installation of tile on shower walls, floors and curbs. It provides detailed instructions for every step in the process of tiling a custom ceramic tile shower and is loaded with instructional pictures!
Related Information
- Single Handle versus Dual Handle Faucets
- How to Install a New Sink Faucet
- How to Fix a Leaky Outdoor Faucet
Additional Plumbing Resources from Amazon.com
 |
 |
Get Free Bathroom Remodeling Price Quotes with No Obligation!
Fill out our 3-5 minute quick and easy form, and receive a free price quote on a bathroom remodeling project from one of our pre-screened and licensed bathroom remodeling contractors. This process is free and there is no obligation to continue once you receive your bathroom addition price estimate.