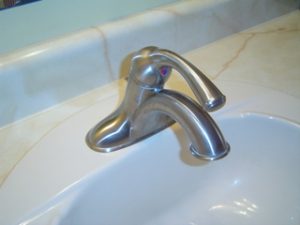
A Quick How-to Guide for Installing a New Faucet
By Mark J. Donovan
|
|
Installing a new faucet is a small enough project that most Do it Yourself homeowners can tackle with a little plumbing knowledge and some basic tools.
You can install a new faucet in one to two hours using a pair of large channel lock pliers and a crescent wrench. Turn the Water Off To begin with, turn the water supply off to the faucet. Usually this can be done by turning the valves off under the sink. Confirm the water to the faucet is off by turning the faucet on and confirming no water flows from it. |
Remove the Old Faucet
Next disconnect the flexible supply lines from the valves attached to the hot and cold supply pipes.
After disconnecting the flexible supply lines, remove the old faucet mounting nuts that secure the faucet to the sink.
| Next, remove the mounting nut that holds the Stopper Pull Rod and Stopper Drain bracket assembly to the drain tail pipe.
Then remove the J-Trap drain assembly from the sink tail pipe. The faucet should now be able to be lifted from the sink. With the old faucet removed, clean around the sink area using a rag and putty knife. |
 |
Select a New Faucet
Next visit your local home improvement store and find a replacement faucet with the same spacing between the hot and cold threaded tail pieces of your old faucet. Also pick up two flexible replacement supply lines.
Reconnect the J-Trap Drain Assembly to the Drain Tail Pipe.
Turn the supply line valves back to the ON position.
Turn the new faucet on and check for leaks around all the compression fittings. If any leaks are found, turn off the supply line valves and tighten the leaky fitting nuts. Then turn the supply lines back on and confirm the leaks have been stopped.
For information on installing a shower pan membrane liner for a ceramic tile shower, see the Shower Pan Membrane Liner Installation eBook from HomeAdditionPlus.com. The Shower Pan Membrane Liner EBook will quickly teach you the step-by-step process for installing the shower pan membrane liner correctly. It includes instructions on framing the shower stall, pouring the pre-slope and shower base mortar, and installing the shower pan membrane liner.
For information on how to tile a custom ceramic tile shower, see the “How to Tile a Custom Ceramic Tile Shower eBook” from HomeAdditionPlus.com. This eBook will quickly provide you with step-by-step instructions on how to measure and install ceramic tile in a shower, including the installation of tile on shower walls, floors and curbs. It provides detailed instructions for every step in the process of tiling a custom ceramic tile shower and is loaded with instructional pictures!
Related Information
- How to Fix a Leaking Showerhead Faucet
- How to Replac a Leaky Bathtub Faucet Valve Stem
- How to Fix a Leaky Faucet
Additional Plumbing Resources from Amazon.com
 |
 |
Get Free Bathroom Remodeling Price Quotes with No Obligation!
Fill out our 3-5 minute quick and easy form, and receive a free price quote on a bathroom remodeling project from one of our pre-screened and licensed bathroom remodeling contractors. This process is free and there is no obligation to continue once you receive your bathroom addition price estimate.

