How to Install Wall Mounted Shelves over a Garage Work bench
By Mark J. Donovan
|
|
One way to get some extra storage space in your garage is to install wall mounted shelves over the garage work bench. I actually prefer them over cabinets because shelves are more accessible and easier for storing odd size items. In addition, wall mounted shelves are also much less expensive and are simpler to install than cabinets.
I prefer to have wall mounted shelves extend the entire length of the garage work bench to maximize storage space. I also prefer to first install furring strips and pegboard onto the wall prior to installing the wall mounted shelves. This way I maintain a cleaner look behind the garage work bench, and enable the hanging of items on the pegboard. |
Installing the wall mounted shelves directly to the drywall just leads to ugly visible scuff marks showing up on the wall.
Installing Wall Mounted Shelves
I start out by attaching 1”x3” furring strips to the drywall in a vertical manner, on 16 inch centers, coincident with the wall studs. It is important that the furring strips are secured to the wall studs, using 2 inch screws, to prevent the shelving from falling down.
| After securing the furring strips to the wall, I then attach the pegboard to the furring strips using 1-1/4 inch drywall screws.
Next, I fasten the vertical wall mounted shelving brackets to the pegboard and directly over the center of the furring strips. I prefer to use 2-1/2 inch screws for mounting the vertical brackets to ensure I penetrate through the pegboard, furring strips and drywall, and into the wall studs. Typically I install vertical brackets on the ends of the shelving and every 32 inches in between, or effectively every other wall stud. If your stud spacing in the garage is 24 inches on center, then I would recommend installing a bracket on every wall stud. |
 |
Make sure to use a level to ensure that the vertical brackets are perfectly plumb when screwing them to the wall. Also make sure that the top of each vertical bracket is at the same height with all the others. Again, use a level to make sure all the vertical brackets are perfectly level and aligned with one another.
I then mount the horizontal wall mounted shelf brackets onto the vertical brackets. Typically they just slip into place in the grooves associated with the vertical brackets. Finally, I attach the wood shelving onto the horizontal brackets, securing them with small screws.
| Installing Shelf Angle Brackets
As an alternative to the standard vertical and horizontal wall mounting shelf brackets, you can also use large shelf angle brackets. These types of brackets are less flexible, as you can not adjust the height of the shelving later. They also require a little more care to make sure they are properly level. They are however, a bit less expensive. As with the installation of the vertical brackets it’s just as important to make sure that these types of brackets are fastened into the wall studs. Once the brackets are installed you can then attach the shelving material to the brackets, again securing them to the brackets with small screws. |
 |
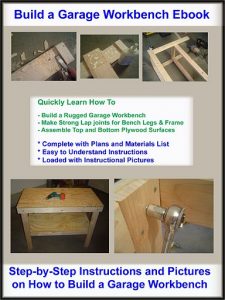
For information on building a garage workbench see the Build a Garage Workbench Ebook from HomeAdditionPlus.com. The “Build a Garage Workbench Ebook” will show you how to build your own rugged Garage Workbench. It provides detailed, yet easy to understand, instructions and mechanical drawings for building a garage workbench, and pictures are included in every step of the build process. Order and Immediately Download today!
Related Information
Free Garage Addition Price Quotes with No Obligation!
Fill out our 3-5 minute quick and easy form, and receive a free price quote on a garage addition from one of our prescreened and licensed garage addition contractors. This process is free and there is no obligation to continue once you receive your garage addition price estimate.