Tips on How to Install a Garage Door Opener
By Mark J. Donovan
|
|
Once you have experienced the ease of using a garage door opener to open your garage door it is tough going without it.
Recently our old garage door opener died. The motor no longer functioned. We went about a week before we decided that we could wait no longer to install a new garage door opener. While buying a garage door opener I was surprised at all the new bells and whistles that come along with even the simplest of garage door openers. |
Besides having a remote control that sits in your car and a switch that bolts up to the inside of your garage, most models also offer a wireless entry keypad that sits on the outside of your garage.
This is great for when the kids come home from school or in the event you locked yourself out of your home.
Installing a garage door opener is easy to do, however a spare pair of hands can be a help. To install a garage door opener you will need for tools a couple of wrenches and screwdrivers and a step ladder.
Garage Door Opener Mounting Brackets
To install a garage door opener the first thing you need to do is fasten the angle iron mounting brackets to the garage ceiling joists. If your garage ceiling is finished, make sure you anchor the mounting brackets into the ceiling joists or trusses and not just the drywall.
| Garage door opener installation manuals typically suggest a number of recommended mounting bracket configurations, so determine what works best for your situation.
Garage Door Bracing Brackets If you have a metal or MDF type garage door you may need to fasten metal bracing members onto it so that the garage door opener does not damage the garage door when pulling it up or pushing it down. Typically you need to purchase some angle iron separate from the garage door opener kit. |
 |
Normally I fasten about a 4 to 5 foot length of angle iron centered across the top inside edge of the garage door and a vertically centered member that runs down approximately 1 foot from the top of the garage door. Basically I create a T type configuration and fasten it to the garage door with sheet metal screws.
Installing Garage Door Mounting Bracket for Rod
After installing the garage door brackets and bracing, next install the metal bracket just above the garage door that will hold the end of the garage door opener metal rod. Make sure it is fastened securely into a header that sits above the garage door.
Assembling the Garage Door Motor, Arm and Chain AssemblyNext, assemble the metal rod assembly and attach it to the garage door motor per the manufacturer’s instructions. Then feed the garage door opener chain around the pulley system at the far end of the rod and feed it back around the sprocket on the garage door opener motor. |
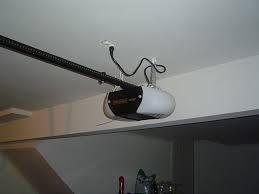 |
Continue around the sprocket and feed it all the way to the end of the arm and fasten it to the sliding arm mounting bracket that is located on the rod.
Make sure to secure the chain to the garage door sliding arm mounting bracket using the supplied chain link pieces and to tension it to the manufacturer’s recommendations.
Raising the Garage Door Opener
Next, attach the far end of the garage door opener rod into the mounting bracket located on the header, using a bolt and a cotter pin to hold it in place.
Then raise the motor end of the garage door opener up to the brackets and secure it to the brackets using bolts, nuts and lock washers.
Attaching Garage Door Opener Arm AssemblyNext, attach the arm assembly that attaches to the garage door (or garage door angle iron) and to the sliding arm mounting bracket on the garage door opener rod. |
|
Install Garage Door Opener Optical Sensors
Next install the 2 optical sensors at the bottom of each garage door side rail. Run the wiring back to the motor assembly and make the electrical connections as specified in the garage door opener installation manual.
Attach Door Opener Switch and Wireless Entry Keypad
Now attach the door opener switch to the inside edge of the garage door doorframe, and run the wires back to the motor assembly and make the electrical connections as specified in the garage door opener installation manual.
Then connect the wireless entry keypad unit to the outside of the garage, near the garage door opening.
Power Up, Test and Adjust
Plug in the garage door opener and then test the garage door opener to see if the garage door opens all the way and closes snuggly against the garage floor. Typically you will need to make some minor adjustments by turning a couple of screws on the garage door opener motor assembly.
Once you’ve completed the adjustments your garage door opener should give you years of maintenance free pleasure.
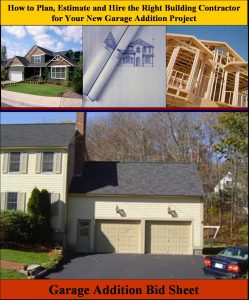
For more information on building a garage addition see the Garage Addition Bid Sheet from HomeAdditionPlus.com. The Garage Addition Bid Sheet includes an extensive questionnaire (Request for Quote) that a homeowner can provide to prospective general contractors and subcontractors for bidding the garage addition.
In addition, the Garage Addition Bid Sheet also includes estimated costs and time intervals for constructing a garage addition as well as a list of key home material manufacturers. Finally, the Garage Addition Bid sheet includes an extensive set of helpful tips and advice on making sure the garage addition is built properly and on time and budget.

Related Information on Garage Door Opener Installations
- How to Insulate a Garage Door
- How to Install a Garage Door Seal
- How to Install a Garage Door Opener Quickly
- How to Install a Garage Door Threshold Seal
Free Garage Addition Price Quotes with No Obligation!
Fill out our 3-5 minute quick and easy form, and receive a free price quote on a garage addition from one of our prescreened and licensed garage addition contractors. This process is free and there is no obligation to continue once you receive your garage addition price estimate.