Simple Tips on How to Remove Vinyl Flooring Covering and Underlayment
By Mark J. Donovan
|
|
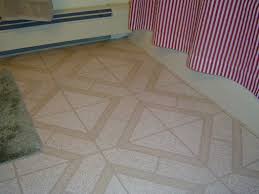
When installing a new floor covering sometimes it makes better sense to remove the old vinyl floor covering and underlayment altogether, rather than install the new floor covering directly over the existing floor covering.
Check for Old Asbestos Based Vinyl Floor Covering To remove the old vinyl floor covering and underlayment it is important to first make sure that the old floor covering is not an asbestos based vinyl product. If the floor covering is vinyl that was installed after the 1970’s then there should be no risk of asbestos in the vinyl. |
If, however, the vinyl floor covering was installed in the 1970’s or earlier you should have the floor first tested for asbestos prior to disturbing it.
Assuming your floor covering is not asbestos based vinyl then you can remove the floor covering and underlayment yourself. However, before beginning the removal, it is important to check to see how the underlayment was attached to the subfloor.
| Remove Baseboard Trim
First remove all of the baseboard trim in the room that will receive the new floor covering. Test for Underlayment Attachment Method Next, using a utility knife and a scraper remove a small section of the vinyl floor covering to see how the underlayment was fastened to the subfloor. If the underlayment was screwed down, then you will need to first remove the old floor covering with a scraper and then remove the screws from the underlayment. If, on the other hand, the underlayment was nailed down you can remove the old floor covering and underlayment altogether, in sections. |
 |
Cutting the Old Floor Covering and Underlayment
Assuming the underlayment was nailed down, use a circular skill saw with a carbide tipped blade set at a depth such that the blade penetrates just through the old vinyl floor covering and underlayment. You do not want to cut the subfloor.
Use the circular saw to cut small square sections of the old floor covering and underlayment, e.g. 2’x2’ to 3’x3’ sections. Use a reciprocating saw near the edges of the floor and the cabinet area, if working in a kitchen or bathroom. Note when performing this project make sure to use eye protection.
| Use Utility Knife near Cabinets
When cabinets are involved, it is also wise to first score the old floor covering and underlayment with a sharp utility knife near the cabinets to help create a stress crack so that the material breaks along this line when lifting it with a pry bar. This technique will help to prevent damage to the cabinets. Lift Old Flooring Material with Pry Bar After cutting the old floor covering and underlayment up into small sections, use a pry bar, or cats-claw to carefully lift and remove the sections of old flooring material. |
 |
Patch Subfloor where Required
Once all of the old floor covering and underlayment have been removed, patch the subfloor where required with putty or a self leveling compound so that the subfloor is completely smooth and free of any bumps or ridges, and ready for the installation of new underlayment and floor covering.
For help on finding a wood flooring installation contractor, see HomeAdditionPlus.com’s Wood Flooring Installation Bid Sheet. It will help ensure that you find and hire the right flooring installation contractor for your wood flooring project. In addition, it will help to ensure that your wood floor installation is completed on time and on budget.
Related Information
- How to Repair Damaged Vinyl Flooring
- How to Repair Curling Vinyl Flooring
- How to Remove Vinyl Flooring
Additional Flooring Resources from Amazon.com
 |
 |
Free Home Addition Price Quotes with No Obligation!
Fill out our 3-5 minute quick and easy form, and receive a free price quote on a house addition from one of our prescreened and licensed home addition contractors. This process is free and there is no obligation to continue once you receive your house addition price estimate.