A DIY Window Trim Installation Guide
By Mark J. Donovan
|
|
Installing Trim around a Window provides the finishing touch to complementing the window and its associated drapery.
Window Trim installation is not too difficult for a DIY homeowner to do, as long as he or she has the right tools. I highly recommend the use of a Miter Saw, such as a Black & Decker BDMS200 15 Amp Miter Saw with Laser, and Nail Gun, such as a Bostitch N62FNK-2 15 Gauge 1-Inch to 2-1/2-Inch Angled Finish Nailer. In addition, you will also need a level, square, tape measure, pencil, shims, wood or caulk filler, and a center punch. Material Required for Installing Window Trim For window trim material, it somewhat depends on the material of the window itself and what look you are trying to achieve with the finished work. |
I will focus my instructions on Trimming out a basic double-hung window. I will also discuss a couple of Trim-out options.
Typically material required includes: Window Casing, Stool (the Sill material), and 1”x N” Select quality boards. I typically use pine if I am painting the Trim, however you can also use Pine, or other materials such as Poplar, Oak, or Maple if you plan on staining the wood or putting on a clear finish.
Installing Window Trim Extension Jambs
The first thing to do is to look at the installed window and see if the Window Jambs extend out all the way so that they are flush with the finished wall surface. If they do, then the job has just gotten easier. If they do not, then you will need to rip/cut strips of 1”x N” boards in widths that will Extend the Jambs out flush with the finished wall surface. Typically I install the top piece first, followed by the sides. Note: shims, or blocks of wood may be necessary to bring the extension jamb out such that it is flush with the original jamb.
If you do not plan on having a Window Sill, and instead want a finished window look that resembles a Picture frame, then you do not need to add an extension jamb to the bottom section of the window. If you do want the Picture Frame Trimmed out look, then go ahead and add the bottom extension jamb. However, when installing this jamb, make sure the top surface of it is at the finished height you want to see. Typically you want this extension jamb to sit about ¾” higher than the bottom of the window when it is closed. This creates a type of pocket for the window to sit against. Note: Filler blocks of wood may need to be inserted underneath the extension jamb to raise it up.
| Installing Window Trim Stool (Window Sill)
The stool is required if you want a window sill. Stool is sold in various widths. I typically use a 4” wide stool. Cut a length of stool such that it extends beyond both sides of the window sufficient enough to include the Window Casing trim, plus1”. This extra inch will allow the Window Casing to rest on the Sill and leave room for reveals. Now measure the length of stool and make a mark in the center of it. Then measure the gap at the bottom of the window, between the two vertical extension jambs, and make a center point mark. Next, marry up the marks of the cut Window sill piece and the mark on the window. While holding the Sill steady, draw marks on the sill where the edge of each vertical extension jamb intersects its. Next measure the depth of the window to the edge of the finished wall surface. Again, do this near the bottom of the window. |
 |
Now use your square to draw straight lines on the sill piece that are in-line with the marks that you made. These lines should be perpendicular to the length of the Sill.
Now measure in from the back side of the sill (the side that will touch the window) and near the ends, the depth of the window that you previously measured. Make two marks about 2” to 3” apart. Use a straight edge to draw a line, such that it intersects with the other perpendicular line that you drew. Repeat on the other side of the sill. The areas inside these lined boxes will be cut away, leaving with you a large tongue that fits snuggly between the two side jambs and with tabs long enough for the casing trim to rest on with margin for reveal.
Slide the sill in between the vertical extension jambs and set it at a height, such that the bottom of the sill is flush with the bottom of the window. This will create about a ¾” pocket. The window should sit flush up against the sill edge. Blocks of wood or Shims may be required. Apply nails toward the edge and center of the board. Also apply a single nail into each tab, such that they penetrate into the studs behind the finished wall. The worst is done.
| Installing the Finished Casing Trim around the Window
On the left hand side of the window, measure from the top of the sill to 3/16” to ¼” up from the bottom surface of the upper extension jamb and make a mark. Repeat on the right. Run a level between these two marks and see if they are level. If they are great, and if not adjust one of the marks slightly up or down to achieve level. Next measure a length of Casing Trim equal to the left hand side measurement, ensuring that you are measuring from the inside surface of the Casing Trim. This mark will represent the Bottom of a 45 degree cut. Do the same on the right side. Cut both pieces using the Miter Saw. |
 |
Now place the left one up on the sill and leave about a 1/8” to 3/16” reveal showing on the vertical extension jamb. The sill should extend beyond the casing trim by approximately ½”. Use a level to ensure that the Casing Trim is true vertical and then put two nails in. One at the bottom and one at the top. The nails should be inserted about 1-2” from the vertical ends and about ½” from the outside edge. Repeat this process for the other side.
Next measure at the top of the window the distance between the inside casing trim pieces. Cut an additional piece of Casing Trim, at 45 degree angles, such that the distance between the two inner cuts is equal to the distance between the two already installed vertical casing pieces. The piece should lay snuggly between the two vertical members. Secure it with nails and you are nearly complete. Note: sometimes a small shim will be necessary in the top vertical corners to ensure that the two pieces are flush with each other.
The last piece of Casing Trim that needs to be installed sits under the stoop. Again, measure the length of stoop and subtract 1”. Cut a piece of Casing Trim this length, however at an angle of 10 degrees on each side. Note the top edge of this piece of Casing trim should be the length of the Sill minus the 1”. Now place this piece of Casing Trim under the Sill, making sure it is centered with the sill, and then nail.
Additional Nails should be installed in each of the boards near the inner and exterior edges of the trim pieces. Nails should be place toward the edges and in the center of the pieces.
Finally, use the center punch and a hammer to sink any nails that may have not already been sunk.
All that is left is to caulk and paint/stain and you are ready for Drapery.
Dress Up Your Home with Crown Molding – For specific instructions on installing crown molding see the “Installing Crown Molding Ebook“. The “Installing Crown Molding Ebook” will show you how to properly measure, select, cut and install crown molding like a professional carpenter. It provides detailed instructions on every step in the process of installing crown molding and includes 28 instructional pictures! Order and Immediately Download today!. 100% Money-Back Guarantee if you are not satisfied.
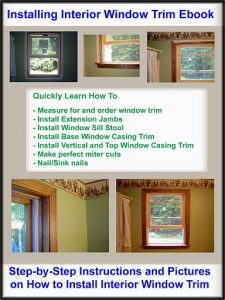
For information on installing Window and Door trim see HomeAdditionPlus.com’s Installing Interior Window Trim Ebook and Installing Interior Door Trim Ebook. These Ebooks are loaded with pictures and provide easy to understand, step-by-step instructions, on how to install interior window and door trim.
Related Information
Additional Finish Carpentry Resources from Amazon.com
 |
 |
Free Home Addition Price Quotes with No Obligation!
Fill out our 3-5 minute quick and easy form, and receive a free price quote on a house addition from one of our prescreened and licensed home addition contractors. This process is free and there is no obligation to continue once you receive your house addition price estimate.