A Baseboard Trim Installation Guide
By Mark J. Donovan
|
|
Installing Baseboard trim is something any DIY homeowner can do.
Baseboard trim installation requires the following tools: Hammer, ¼” thick shims, a miter saw, such as the Black & Decker BDMS200 15 Amp Miter Saw with Laser, measuring tape, a square, coping saw and carpenters pencil. Baseboard Trim Installation Preparation When installing baseboard trim in a new room, one thing that should be considered is what the finished flooring material will be. If carpet is expected to be the finished surface, then the Baseboard trim should be installed ¼” off the base floor. |
To do this, simply cut several shims ¼” in height and rest the Baseboard trim on it prior to nailing. Once the Baseboard trim is secured to the wall remove the shims.
Raising the Baseboard trim is done for a couple of reasons. First, and especially with 4” or narrower Baseboard trim, you want the finished baseboard trim to get full exposure. Carpeting, including the pad, stands as high as ½” to 1” in height. Second, the ¼” space allows the carpet to be tucked under the trim by the carpet installer. This helps keep the carpet secured to the tack strips as well as gives a clean and finished look to the carpet.
| When installing baseboard trim it is best to use baseboard trim that is long enough to go the whole length of the wall to eliminate joints. Thus, order your baseboard trim according to wall lengths. In the event joints are required, always gut the butting ends of the baseboard trim on a 45 degree angle. It makes for more of a finished look.
Installing Baseboard Trim To begin installing baseboard trim, start with the longest wall. Simply cut the baseboard trim to the length of the wall, using the miter saw, and rest on top of the ¼” shims if required. |
 |
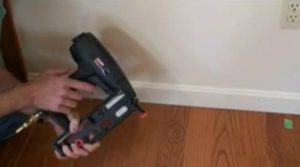
Apply 8 penny finished nails every 16 inches along the length of the baseboard trim. Make sure the nails penetrate studs to ensure a solid attachment to the wall.
Working in a clockwise fashion, prepare to install the next section of baseboard trim.
First measure the length of the wall. Make sure your measurement is done just above the height of where the top of the baseboard trim will sit.
Continue this process all around the room, working in the same direction.
Once completed, go back and sink the nails with a center punch.
Apply wood filler or caulk into the nail holes of the installed baseboard trim and you are ready to apply stain or paint.
Dress Up Your Home with Crown Molding – For specific instructions on installing crown molding see the “Installing Crown Molding Ebook“. The “Installing Crown Molding Ebook” will show you how to properly measure, select, cut and install crown molding like a professional carpenter. It provides detailed instructions on every step in the process of installing crown molding and includes 28 instructional pictures! Order and Immediately Download today!. 100% Money-Back Guarantee if you are not satisfied.
For information on installing Window and Door trim see HomeAdditionPlus.com’s Installing Interior Window Trim Ebook and Installing Interior Door Trim Ebook. These Ebooks are loaded with pictures and provide easy to understand, step-by-step instructions, on how to install interior window and door trim.
Related Information
Additional Finish Carpentry Resources from Amazon.com
 |
 |
Free Home Addition Price Quotes with No Obligation!
Fill out our 3-5 minute quick and easy form, and receive a free price quote on a house addition from one of our prescreened and licensed home addition contractors. This process is free and there is no obligation to continue once you receive your house addition price estimate.

