A Guide on How to Caulk Baseboard Trim, Chair Rail, Wainscoting, Crown Moulding and Door and Window Trim
By Mark J. Donovan
|
|
When installing any type of trim that you plan to paint, it’s important to caulk the trim just prior to painting it. You don’t want to caulk trim that you have stained or plan to stain. Use a wood filler instead.
For best results choose a latex caulk that has silicone in it. The silicone will allow the caulk to shrink and expand with the wood so that it won’t crack over time. You can buy latex caulk with various amounts of silicone in it. For example, caulk used in kitchens and bathrooms has a much higher percentage of silicone in it than caulk used in dry areas. |
However keep in mind that silicone is hard to paint, thus why it’s better to use a latex caulk with silicone. This type of caulk is ideal for trim as it paints well, and as mentioned earlier, will expand and contract with the wood. Also, choose a caulk that has a similar color to the painted trim.
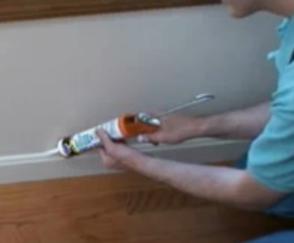
When caulking fine trim cracks, snip off the tip of the caulk tube such that you get a thin bead. If you need to caulk wider cracks then snip off further down the tip of the caulk tube.
| When applying caulk to trim seams apply even pressure on the caulking gun and make one continuous and fluid movement down the length of the seam. Then quickly go back with your finger to even out the bead.
Next, using a slightly moistened paper towel, remove any excess caulk along the length of the seam. Plan to have an entire role of paper towels nearby as you’ll inevitably go through a lot of paper towels when caulking trim. |
 |
Next apply a dab of caulk to each countersunk nail hole. Again use your finger to work the caulk into the holes and then quickly wipe away any excess material with a slightly moistened paper towel. Make sure, however, when wiping away the excess caulk that you don’t create dimples in the nail hole areas.
Allow the caulk to set up for a few hours prior to painting the trim.
One final note: I highly suggest painting the trim prior to installing it. This way you only need to touch up paint the cut trim ends, and the caulked seams and nail holes later on.
Dress Up Your Home with Crown Molding – For specific instructions on installing crown molding see the “Installing Crown Molding Ebook“. The “Installing Crown Molding Ebook” will show you how to properly measure, select, cut and install crown molding like a professional carpenter. It provides detailed instructions on every step in the process of installing crown molding and includes 28 instructional pictures! Order and Immediately Download today!. 100% Money-Back Guarantee if you are not satisfied.
For information on installing Window and Door trim see HomeAdditionPlus.com’s Installing Interior Window Trim Ebook and Installing Interior Door Trim Ebook. These Ebooks are loaded with pictures and provide easy to understand, step-by-step instructions, on how to install interior window and door trim.
Related Information
Additional Finish Carpentry Resources from Amazon.com
 |
 |
Free Home Addition Price Quotes with No Obligation!
Fill out our 3-5 minute quick and easy form, and receive a free price quote on a house addition from one of our prescreened and licensed home addition contractors. This process is free and there is no obligation to continue once you receive your house addition price estimate.