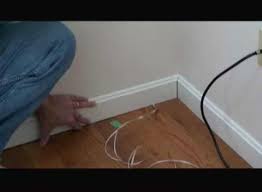
Tips for Saving Time and Money on Installing Baseboard Trim
By Mark J. Donovan
|
|
To obtain professional results for cutting and installing baseboard trim it is best to use a miter saw, coping saw and a finished nail gun. If you do not own a miter saw or finished nail gun, and do not want to purchase them, consider renting them from your local home improvement store.
When cutting and installing baseboard trim in a room there is a preferred sequence. By following this preferred installation sequence, you can save time and money in wasted trim material. For a basic room with four inside corners start by installing the first piece of trim along the wall that is most visible from the room’s entranceway. |
Square cut both ends of the baseboard trim and nail it to the wall. Make sure you fasten the baseboard trim such that the nails penetrate wall studs.
| Next, either working in a clockwise or counter clockwise direction make a coped cut on one end of a baseboard trim piece and butt it up against the first piece of installed baseboard trim. The other end of the board should be square cut.
Continue to work your way around the room, until you get to the last piece. For the last piece of baseboard trim, cope cut both ends of the baseboard trim and install the piece along the remaining wall, to complete the installation of the baseboard trim project. |
 |
In the situation where you have a long wall and need to join two pieces of baseboard trim molding together, use a scarf joint. A scarf joint involves cutting the butting ends of the two baseboard trim pieces at 45o degrees so they form a neat and clean joint.
Dress Up Your Home with Crown Molding – For specific instructions on installing crown molding see the “Installing Crown Molding Ebook“. The “Installing Crown Molding Ebook” will show you how to properly measure, select, cut and install crown molding like a professional carpenter. It provides detailed instructions on every step in the process of installing crown molding and includes 28 instructional pictures! Order and Immediately Download today!. 100% Money-Back Guarantee if you are not satisfied.
For information on installing Window and Door trim see HomeAdditionPlus.com’s Installing Interior Window Trim Ebook and Installing Interior Door Trim Ebook. These Ebooks are loaded with pictures and provide easy to understand, step-by-step instructions, on how to install interior window and door trim.
Related Information
- How to Remove Baseboard Trim
- How to Properly Fasten Baseboard Trim
- How to End Baseboard Trim on a Wall
Additional Finish Carpentry Resources from Amazon.com
 |
 |
Free Home Addition Price Quotes with No Obligation!
Fill out our 3-5 minute quick and easy form, and receive a free price quote on a house addition from one of our prescreened and licensed home addition contractors. This process is free and there is no obligation to continue once you receive your house addition price estimate.

