Check to Make Sure there is no Asbestos in Your Popcorn Ceiling Before Removing It
By Mark J. Donovan
|
|
So you’re tired of that old popcorn ceiling and want to remove it. Before removing a popcorn ceiling, however, it’s imperative that you make sure the popcorn ceiling does not contain asbestos. Asbestos is a substance that can cause lung cancer. If your home was built after 1979 then more than likely the popcorn ceiling does not contain asbestos and you can remove the popcorn ceiling yourself. If your home was built prior to 1979 then there is a good chance that there is asbestos in the popcorn ceiling. This doesn’t mean that popcorn ceilings can’t be removed in older homes.
It simply means you need to call in a professional asbestos abatement contractor to test the popcorn ceiling for asbestos and have them safely remove it if it indeed does contain asbestos. |
You can also test the popcorn ceiling yourself for asbestos by taking a few small samples of the popcorn ceiling and sending them to a lab for analysis. Check your local phone book or on the internet for local asbestos testing labs in your area. They can provide you with test kits and explain how to take the samples safely.
Tools for Removing Popcorn Ceiling
Once you’re certain that your popcorn ceiling is asbestos free you can move forward and remove the popcorn ceiling. First you’ll need to gather the right tools for the job. You’ll need the following items.
- Safety glasses and mask
- Six inch putty knife
- Spray bottle with water
- Small step ladder
- Bucket
- Polyethylene plastic
| Removing Popcorn Ceiling
First, lay polyethylene plastic on the floor so that any dropped popcorn ceiling mixture doesn’t end up on your flooring. Then put on your safety glasses and mask and get ready for some fun! The main trick to removing a popcorn ceiling is to work in small areas at a time. Use you spray bottle to dampen a small area, e.g. approximately a 2 square foot area. Be careful not to over wet the area. Again you want to dampen the popcorn ceiling, not drench it. |
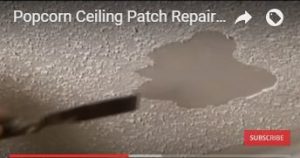 |
Drenching the ceiling could cause damage to the drywall that sits underneath the popcorn ceiling material.
After the water has had about a minute to absorb the water use your putty knife to gently scrape away and push off the popcorn ceiling. Be careful not to gouge the drywall and cut the drywall paper facing. Dump the scraped off popcorn ceiling in your bucket and continue with this process until you’ve removed the entire popcorn ceiling. You’re neck and arms are going to get pretty sore, so take your time.
Once you’ve removed the popcorn ceiling you can then lightly sand the ceiling with a pole sander, and then prime and paint it to complete the project.
For information on repairing a large drywall hole, see the “How to Repair a Large Drywall Hole” Ebook from HomeAdditionPlus.com. The “How to Repair a Large Drywall Hole” Ebook provides step-by-step instructions on how to repair your damaged wall so that it looks as good as new.
See HomeAdditionPlus.com’s Drywall Calculator
Related Information
- How to Repair a Cracked Drywall Ceiling
- How to Repair a Drywall Tape Seam
- How to Patch Drywall Nail Pops
Additional Drywall Installation Resources from Amazon.com
 |
 |
Free Home Addition Price Quotes with No Obligation!
Fill out our 3-5 minute quick and easy form, and receive a free price quote on a house addition from one of our prescreened and licensed home addition contractors. This process is free and there is no obligation to continue once you receive your house addition price estimate.