Tips for Installing Corner Bead and Getting a Professional Drywall Finish
By Mark J. Donovan
|
|
Corner bead is installed in conjunction with drywall. Corner bead is a thin perforated metal or plastic strip that is nailed or screwed into place over outside wall corners, where two pieces of drywall join together. By using corner bead on outside corners, you can achieve clean, sharp outside finished corners. Corner bead is available in several different styles including L-bead, Bullnose, Splayed and Arch corner bead.
Installing corner bead is very simple to do. To begin with, first measure the length of the outside corner, and then cut a single piece of corner bead to length using a pair of tin snips. |
Do not use more than one piece of corner bead on a corner. Splicing corner bead sections together normally results in a less than professional look.
Next, place the piece of corner bead over the outside corner edge so that you form a clean angle and edge.
| While holding the corner bead firmly in place, install nails or screws into each side of it every 8-10 inches, all the way up the length of it. Make sure to slightly sink, or dimple the drywall nails or screws into the corner bead.
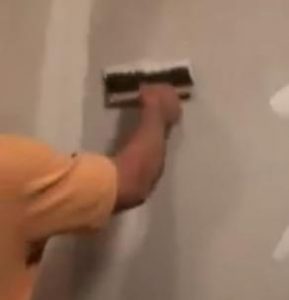
Once you have nailed the corner bead into place, you can then move on to the taping and mudding phase of your drywall project. When it comes to mudding outside corners with installed corner bead, first run a heavy application of joint compound down each side of the corner bead using a 4-6” drywall taping knife. The joint compound should be applied so that it fans out from the outside corner bead edge by approximately 4-5 inches. |
 |
Allow the joint compound to fully dry before applying a second coat. When applying the second coat of joint compound use a larger drywall knife and fan out the edges approximately 6-10 inches from the outside corner edge.
| Again, allow the second layer of joint compound to fully dry before applying the final skim coat of joint compound over the corner bead.
Once the final skim coat of joint compound has dried, lightly sand the corner with a pole sander. And with the sanding complete your outside corner is ready for primer and paint. |
 |
Start the sheetrocking of the walls at the top of the wall, and make sure to butt the drywall sheets up flush against the ceiling sheetrock pieces. This will further help to hold the ceiling drywall in place, at least along the edges of the ceiling.
For information on repairing a large drywall hole, see the “How to Repair a Large Drywall Hole” Ebook from HomeAdditionPlus.com. The “How to Repair a Large Drywall Hole” Ebook provides step-by-step instructions on how to repair your damaged wall so that it looks as good as new.
See HomeAdditionPlus.com’s Drywall Calculator
Related Information
Additional Drywall Installation Resources from Amazon.com
 |
 |
Free Home Addition Price Quotes with No Obligation!
Fill out our 3-5 minute quick and easy form, and receive a free price quote on a house addition from one of our prescreened and licensed home addition contractors. This process is free and there is no obligation to continue once you receive your house addition price estimate.