How to Texture Drywall Walls and Ceilings
By Mark J. Donovan
|
|
Texturing drywall is an excellent way to add some depth and pizzazz to your home. Drywall texture methods can be applied to both walls and ceilings. Texturing drywall is a messy job, so before beginning a drywall texture project, make sure you empty the room of all its contents, including anything on the walls. Also, if there is existing wallpaper on the walls it will need to be removed as well. If you have finished floors make sure to lay drop clothes down.
Drywall Texturing Walls To texture drywall ceilings or walls you will need a wide (e.g. 10”) drywall taping knife and all purpose premixed joint compound. |
In addition, depending upon your level of drywall texture creativity you will need a number of texturing tools, e.g. paint brushes and sponges.
Texturing drywall walls is similar to painting walls. Begin at the wall corners and edges, e.g. along the ceiling edge and then along the baseboard trim. Use your taping knife and apply approximately a 1/8 thick layer of joint compound over the wall surface.
| Then using your drywall taping knife, paint brush or sponge, swirl the joint compound to create your preferred drywall texture surface. Again, depending upon your level of creativity and personal preferences, use whatever tools you like to work the joint compound into any pattern you desire.
After working the edges of the wall, begin to apply joint compound to the rest of the wall surfaces and create your desired drywall texture. However, do not cover too large of an area at any one time. Though joint compound takes quite a while to set up, it is best to work it when it is as wet as possible. |
 |
Consequently it is better to work smaller areas at a time, and to frequently interleave between applying joint compound to the walls and creating the drywall texture.
Drywall Texture Ceilings
To drywall texture ceilings, use the same approach, however start in a corner of the ceiling and work your way outwards.
| Skip Trowel Drywall Textured Ceilings
Alternatively, you can loosen up the joint compound with some water and then spread the joint compound on the ceiling. As the loosened joint compound mixture begins to drip from the ceiling use your taping knife to knock down the “stalactites” to create a patchy textured drywall ceiling. Push the drywall taping knife over the ceiling when doing this drywall texture method. This method is specifically known as skip troweling. Note that skip troweling should not be done in lieu of taping and mudding the drywall ceiling. It is important to first tape and mud the drywall ceiling, as you would the walls, before texturing the ceiling. |
 |
After the joint compound has fully dried you can prime and paint over the textured drywall surfaces.
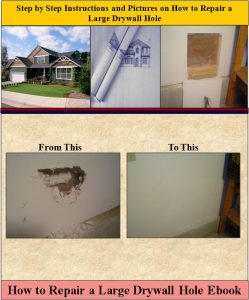
For information on repairing a large drywall hole, see the “How to Repair a Large Drywall Hole” Ebook from HomeAdditionPlus.com. The “How to Repair a Large Drywall Hole” Ebook provides step-by-step instructions on how to repair your damaged wall so that it looks as good as new.
See HomeAdditionPlus.com’s Drywall Calculator
Related Information
Additional Drywall Installation Resources from Amazon.com
 |
 |
Free Home Addition Price Quotes with No Obligation!
Fill out our 3-5 minute quick and easy form, and receive a free price quote on a house addition from one of our prescreened and licensed home addition contractors. This process is free and there is no obligation to continue once you receive your house addition price estimate.