The Different Applications, Installation Methods and Sizes for Cement Backboard and Greenboard
By Mark J. Donovan
|
|
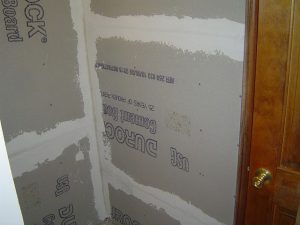
Cement Backer Board and Greenboard Serve Different Applications
Cement Backerboard and Greenboard drywall are often misunderstood by do it yourself homeowners. They are not interchangeable and are designed for specific applications. Cement backerboard is a type of wall or floor sheathing that is specifically engineered for wet or heavily moist tile environments, such as ceramic tiled shower stalls. |
Greenboard drywall, on the other hand, is designed for damp areas such as on bathroom and basement walls.
Greenboard – Not For Shower Stalls
Greenboard drywall, versus backerboard, should never be used in shower surrounds or ceramic tile showers.
Greenboard drywall consists of gypsum material sandwiched between water resistant paper. The paper is not waterproof.
| Consequently if greenboard drywall is used in a tiled shower stall, water will eventually wick its way through the tile grout and water resistant paper and begin to breakdown the gypsum material.
When the gypsum material becomes wet the structural integrity of the greenboard will crumble and mold growth will occur. |
 |
In addition, the ceramic tiles will eventually begin to separate from the greenboard drywall and create a disaster of a mess.
| Cement backerboard, on the other hand, can literally be placed in water indefinitely and it will not break down. It is also more rigid and porous and thus does a better job of supporting ceramic tiles.
See how to cut cement backerboard in this short video. Cement Backerboard versus Greenboard Drywall Installation Cement backerboard is more difficult to install than greenboard, however with a sharp utility knife and a straight edge it can be cut effectively the same way as greenboard drywall. |
 |
Just make sure to wear a rugged pair of work gloves when handling backerboard as it can do a number on your hands.
To make straight cuts on backerboard material, simply score it with a utility knife on both sides and then snap it along the scored line.
With greenboard drywall score it on the front side. Then snap it along the line by tapping it on the back side along the cut line. Next, with the board slightly folded along the cut, use your utility knife to cut the back paper with the utility knife to complete the cut.
For small punch hole cuts use a drill and drill bit to create pilot holes and a jigsaw with a diamond tip blade to cut out the punch hole.
| Cement backerboard should be fastened to walls and floors rough side facing the tiles when using thinset mortar and smooth side facing the tiles when using an adhesive. Fasten the cement backerboard to the walls or floors using corrosion resistant screws such as Rock-On screws or hot dipped ringed shank nails. Screws or nails should be installed every 6 to 8 inches along wall studs or floor joists.
Make sure to leave about a 1/8 inch space between backerboard panels. Use thinset mortar and 2 inch wide alkaline resistant fiberglass tape to tape and mud all the seams. |
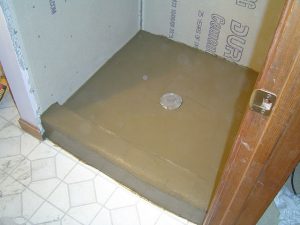
See my “How to Install a Shower Pan Membrane Liner” eBook |
With greenboard drywall installation the process is basically the same, but instead screws / nails can be placed every 12 to 16 inches and you can use all purpose joint compound for taping and mudding seams.
Cement Backerboard versus Greenboard Drywall Size Dimensions
Greenboard drywall is available in ½ inch and 5/8 inch thicknesses and 4 feet widths. Greenboard drywall lengths include 8, 10 and 12 feet panels. Cement backerboard is available in ¼ and ½ inch thicknesses and is commonly found in 3’x 5’ panels.
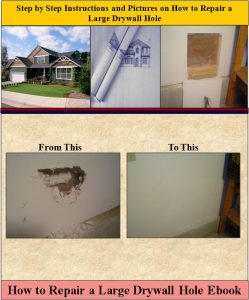
For information on repairing a large drywall hole, see the “How to Repair a Large Drywall Hole” Ebook from HomeAdditionPlus.com. The “How to Repair a Large Drywall Hole” Ebook provides step-by-step instructions on how to repair your damaged wall so that it looks as good as new.
See HomeAdditionPlus.com’s Drywall Calculator
Related Information
Additional Drywall Installation Resources from Amazon.com
 |
 |
Free Home Addition Price Quotes with No Obligation!
Fill out our 3-5 minute quick and easy form, and receive a free price quote on a house addition from one of our prescreened and licensed home addition contractors. This process is free and there is no obligation to continue once you receive your house addition price estimate.