Step by Step Instructions for Installing a Front Door
By Mark J. Donovan
|
|
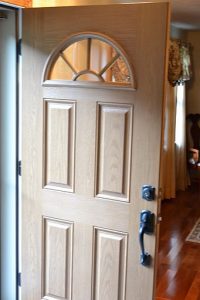
After 20 years we finally needed to replace our front entry door. There was rust and rot at the bottom of the door and the plastic around the windows lites had deformed and cracked from years of ultraviolet exposure. Replacing a front entry door can be done by a do it yourself homeowner however a second pair of hands is helpful for lifting purposes.
The first step in replacing a front entry door is to remove the exterior and interior door trim so that you can get access to the nails or screws that fasten the entry door to the wall studs. |
Use a hammer and a flat bar to remove the old trim pieces, however take care not to damage either the interior drywall or the exterior house siding in the process. A putty knife is helpful in removing the interior door trim. You can use it to gently rock the interior door trim loose from the wall and door frame. You can also use it to act as a shield between the drywall and the surface of the flat bar when prying it off. If you’re extremely careful you may be able to reuse the interior trim, however I often end up simply replacing it. If you want to attempt to save the interior wood trim, pull the nails out of the wood trim via the back of the trim pieces using a pair of pliers.
| Once the door trim has been removed use a reciprocating saw, e.g. a sawzall, with a long metal cutting blade to cut the nails or screws that secure the entry door to the door frame wall studs.
Make sure you wear eye and hand protection when using the reciprocating saw. After cutting all the nails or screws call in your extra pair of hands and remove the entry door from the doorframe. |
 |
The first step in installing a front entry door is to install an ice and water shield membrane along the door sill area to prevent any water from ever reaching the sill plate.
If the particular front entry door you are installing requires a bottom sill extension, attach a piece of 5/4 trim wood to the side of the home under the entry door area, to create a kickboard surface for the door. Then attach a finished oak sill support piece on top of it. Alternatively you may prefer to attach the oak sill support to a piece of supporting angle iron that then attaches to the kick board area, before installing the kickboard piece itself. The sill support helps to ensure that the replacement front entry door has a solid surface to rest on and to prevent it from rocking.
| Next, just prior to installing the new entry door, apply several beads of a waterproof silicone caulk along the top of the sill plate surface to ensure that no water will penetrate underneath the door frame.
Then, with the help of a second pair of hands insert the replacement front entry door into the doorframe opening. Insert the base of the door in first and tilt the top piece into place. |
 |
Make sure you don’t drag the base of the door along the sill plate so that you don’t scuff up the bottom of the door and smear the beads of caulk. Also make sure to center the door in the door frame.
Once you have the door fairly well positioned, secure it to the door frame by driving a couple of nails into the nailing flange plate. Make sure, however, to not sink the nails as you may have to remove them at some point to adjust the door.
After tacking the door into place, use a level and tape measure to make sure it is square and level. Again, you may need to pull the nails you initially installed to square up and level the door.
After ensuring the door is square and level use galvanized nails to permanently fasten the door to the side of the home.
The nails should be installed into the nailing flange plates on the exterior side of the home. After installing the nails, apply ice and water shield membrane over the nailing flange tabs to ensure a water tight seal.
Next, install the door hardware to the door and doorframe and ensure it all works smoothly.
Finally install the interior and exterior trim to complete the project. You can save some time if you pre-paint or stain the trim prior to installing it onto the door frame.
For information on how to install interior door trim, see the “Installing Interior Door Trim” eBook from HomeAdditionPlus.com. The “Installing Interior Door Trim” eBook provides step-by-step instructions on how to install interior door trim. Pictures are included for every key step in the process.

Related Information
- How to Replace an Exterior Door Handle
- How to Install an Exterior Door
- How to Install a Bottom Seal Door Video
Additional Door Resources from Amazon.com
 |
 |
Free Home Addition Price Quotes with No Obligation!
Fill out our 3-5 minute quick and easy form, and receive a free price quote on a house addition from one of our prescreened and licensed home addition contractors. This process is free and there is no obligation to continue once you receive your house addition price estimate.